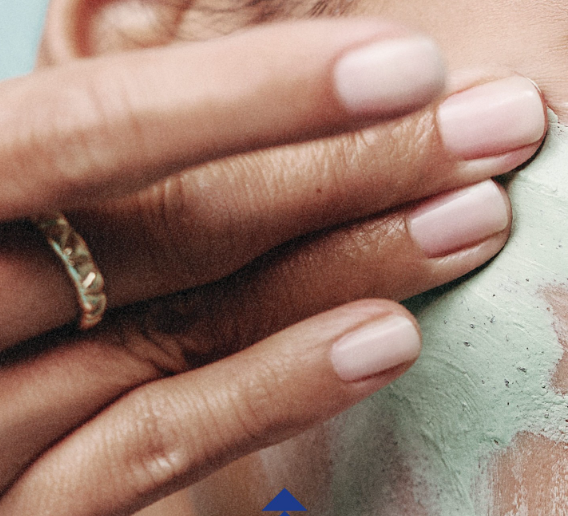
Gel manicures are loved because they last for weeks, resist chipping, and maintain a glossy finish much longer than regular nail polish. However, removing gel polish incorrectly can weaken your natural nails and lead to peeling, splitting, and excessive dryness. Many people are tempted to peel or scrape off gel polish when it starts lifting, but this can remove layers of the natural nail and cause long-term damage.
Learning how to remove gel nail polish properly helps protect your nails and keeps them healthy between manicures. With the right tools and a little patience, you can safely remove gel polish at home without causing unnecessary harm.
Why Proper Gel Polish Removal Is Important
Gel polish adheres strongly to the surface of the nail because it is cured under a UV or LED lamp. This creates a durable coating that cannot simply be wiped away with ordinary nail polish remover.
Improper removal methods can cause:
- Thin and fragile nails.
- Peeling and splitting.
- Rough nail surfaces.
- Increased sensitivity.
- Dry cuticles and surrounding skin.
- Slow nail recovery.
The goal is not simply to get the polish off quickly. The goal is to preserve the health and strength of your natural nails throughout the process.
Supplies You Will Need
Before beginning, gather everything you need so the process goes smoothly.
Pure Acetone
Pure acetone is necessary because regular nail polish remover often lacks enough strength to dissolve gel polish effectively.
Cotton Balls or Cotton Pads
These hold the acetone against the nail and help soften the gel coating.
Aluminum Foil
Foil wraps keep the cotton in place and prevent acetone from evaporating too quickly.
Nail File
A coarse nail file helps remove the shiny top coat, allowing acetone to penetrate the gel layers more effectively.
Wooden Cuticle Stick
An orangewood stick or cuticle stick helps gently push softened polish away without scratching the nail.
Cuticle Oil or Petroleum Jelly
These products protect the skin around the nails from becoming overly dry.
Nail Buffer
A soft buffer can smooth away tiny leftover bits after removal.
Moisturizer or Hand Cream
Acetone strips away natural oils, so moisturizing afterward is essential.
Step 1: File the Top Coat
First, use a nail file to remove the shiny top layer. This step helps acetone reach the gel underneath. As a result, the polish softens faster.
Move the file gently across the nail. Use light pressure and stop when the shine disappears. You do not need to file deeply. In fact, filing too much can damage the natural nail.
Take your time and work slowly. The goal is to remove only the glossy layer. If you reach the natural nail, stop immediately.
Why This Step Matters
The top coat acts like a barrier. Because of that, acetone cannot easily reach the gel polish. Once you remove the shine, acetone works much better.
Avoid These Mistakes
- Do not file aggressively.
- Do not use excessive pressure.
- Do not continue once the shine is gone.
- Do not try to thin the entire gel layer.
Therefore, gentle filing makes the whole removal process easier and safer.
Step 2: Protect Your Skin and Cuticles
Next, protect the skin around your nails. Pure acetone can dry out the cuticles and fingertips. For this reason, apply a small amount of petroleum jelly or cuticle oil around each nail.
This simple step creates a protective barrier. As a result, your skin stays softer during the soaking process.
In addition, healthy cuticles support healthy nails. Therefore, protecting them is just as important as removing the polish itself.
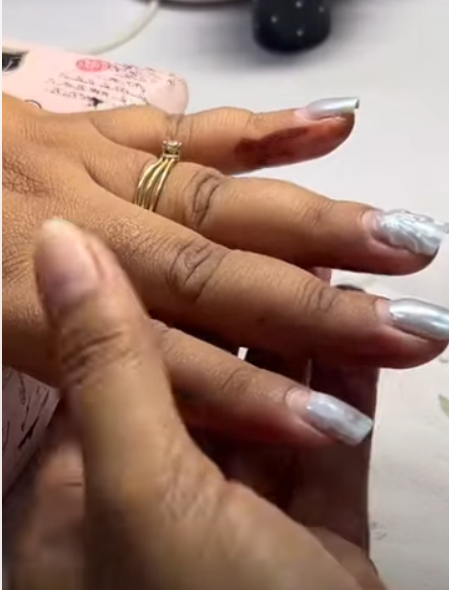
Step 3: Soak Cotton With Pure Acetone
Now, soak a cotton ball with pure acetone. Make sure the cotton is fully saturated. Then place it directly over the nail.
Next, wrap the fingertip with aluminum foil. The foil keeps the cotton in place and prevents the acetone from evaporating too quickly.
Because the acetone stays in contact with the gel, it can break down the polish more effectively.
If wrapping all ten fingers feels difficult, start with one hand first. Then repeat the process on the other hand.
As you learn how to remove gel nail polish, remember that proper soaking is more important than force.
Step 4: Wait Patiently
After wrapping your nails, wait for 10 to 15 minutes. During this time, the acetone slowly softens the gel layers.
However, thicker manicures may need more time. For example, glitter gel or multiple layers often require an additional five minutes.
Avoid checking the nails too early. Instead, allow the acetone enough time to do its job.
Patience is important because forcing the polish off can damage the nail surface.
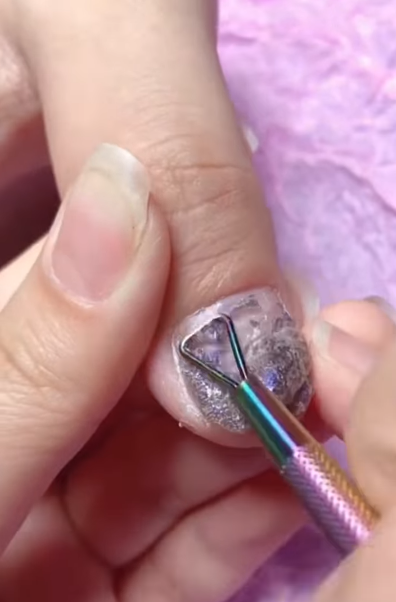
Step 5: Gently Push Off the Softened Gel
Once the soaking time is complete, remove one foil wrap at a time.
You may notice that the gel looks loose, flaky, or wrinkled. If so, use a wooden cuticle stick to gently push the softened polish away.
Apply very light pressure. The gel should come off easily.
However, some areas may still feel hard. In that case, do not scrape them. Instead, soak the nail again for another five to ten minutes.
Many people damage their nails because they rush this step. Therefore, patience is one of the most important parts of learning how to remove gel nail polish safely.
Step 6: Moisturize and Care for Your Nails
Finally, wash your hands and apply cuticle oil. Then use a rich hand cream to restore moisture.
Acetone removes natural oils from the nails and skin. Because of this, moisturizing is very important.
In addition, massage the oil into the cuticles and nail surface. This helps improve flexibility and reduces dryness.
For the next few days, continue using cuticle oil daily. Meanwhile, keep your nails short and avoid harsh cleaning products.
As a result, your nails will recover faster and stay healthier.

How to Remove Gel Nail Polish Without Foil
If foil is unavailable, a bowl-soaking method may work.
Step 1
File the shiny top layer.
Step 2
Pour acetone into a small bowl.
Step 3
Place fingertips in the acetone for 10 to 15 minutes.
Step 4
Check whether the gel has loosened.
Step 5
Use a wooden stick to gently remove the softened polish.
Important Note
Avoid soaking for excessively long periods, as prolonged acetone exposure may significantly dry the skin.
Common Mistakes to Avoid
Peeling Off Gel Polish
Peeling may seem quick, but it often removes layers of the natural nail and can lead to weakness.
Using Metal Tools Aggressively
Metal tools can scratch and gouge the nail plate.
Skipping the Filing Step
Without removing the top coat, acetone cannot penetrate effectively.
Rushing the Process
Trying to force off gel before it softens completely increases the risk of damage.
Excessive Buffing
Too much buffing can leave nails thin and sensitive.
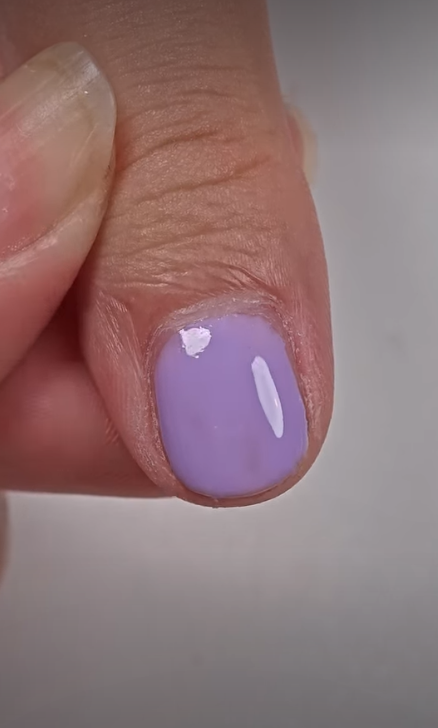
Can Gel Nail Polish Be Removed Without Acetone?
Traditional soak-off gel polish generally requires acetone.
Non-acetone removers are usually ineffective because they cannot break down the hardened gel coating efficiently.
Some peel-off gel systems are designed differently and may come off without acetone. However, standard salon gel polish typically needs pure acetone for safe removal.
This fact is important when understanding how to remove gel nail polish correctly.
When Should You Seek Professional Help?
Home removal may not always be appropriate.
Consider visiting a nail technician if:
- You have hard gel or builder gel.
- Acrylic nails are present.
- The polish refuses to soften.
- You experience pain during removal.
- Your nails are already damaged.
- You suspect an infection.
Professional technicians have specialized tools and techniques that help minimize damage.
Aftercare Tips for Stronger Nails
Once the polish is gone, focus on nail recovery.
Apply Cuticle Oil Daily
Daily hydration improves nail flexibility and appearance.
Keep Nails Short
Shorter nails are less likely to split while recovering.
Wear Gloves During Cleaning
Household chemicals and water exposure may increase dryness.
Use Gentle Nail Care Products
Avoid harsh chemicals for several days.
Give Nails Time to Rest
Allowing your nails a break between gel manicures can help restore their natural moisture.
Conclusion
How to remove gel nail polish safely takes patience, gentle handling, and proper aftercare. Although it may seem tempting to peel or scrape off the polish, doing so can weaken your natural nails and lead to peeling, thinning, and breakage. Therefore, taking your time during the removal process is always worth the extra effort.
The safest method starts with lightly filing the shiny top coat. Next, soaking the nails with pure acetone helps soften the gel so it can come off easily. After that, you should gently push away the loosened polish instead of forcing it. Finally, restoring moisture with cuticle oil and hand cream helps your nails recover and stay healthy.
In addition, regular nail care plays an important role in maintaining strong nails. For example, keeping your nails moisturized, wearing gloves while cleaning, and giving your nails occasional breaks from gel manicures can help prevent dryness and brittleness. These simple habits support healthy nail growth and improve the overall appearance of your hands.
Most importantly, never rush the process. If the gel does not come off easily, soak your nails again instead of scraping harder. Patience protects the nail surface and reduces the risk of long-term damage. Likewise, avoiding aggressive filing and excessive buffing helps preserve the natural strength of your nails.
By following the correct steps and practicing good aftercare, you can enjoy long-lasting manicures without sacrificing nail health. Healthy nails provide the best foundation for future manicures, and with the right approach, you can continue wearing gel polish while keeping your natural nails smooth, strong, and beautiful for years to come.