Spooky manicures have plenty of room for creativity, from delicate accents to bold artwork that instantly catches attention. Halloween Nail Ideas can combine sharp lines, tiny figures, rich dark shades, and playful patterns while keeping the overall look polished rather than overcrowded. Pink ghost details bring a softer, more playful touch, while deeper colors create a moodier finish. Even a small color adjustment can transform a familiar Halloween design into something fresh, making it easy to find a style that feels festive without looking overly complicated.
1. Skulls and Stripes
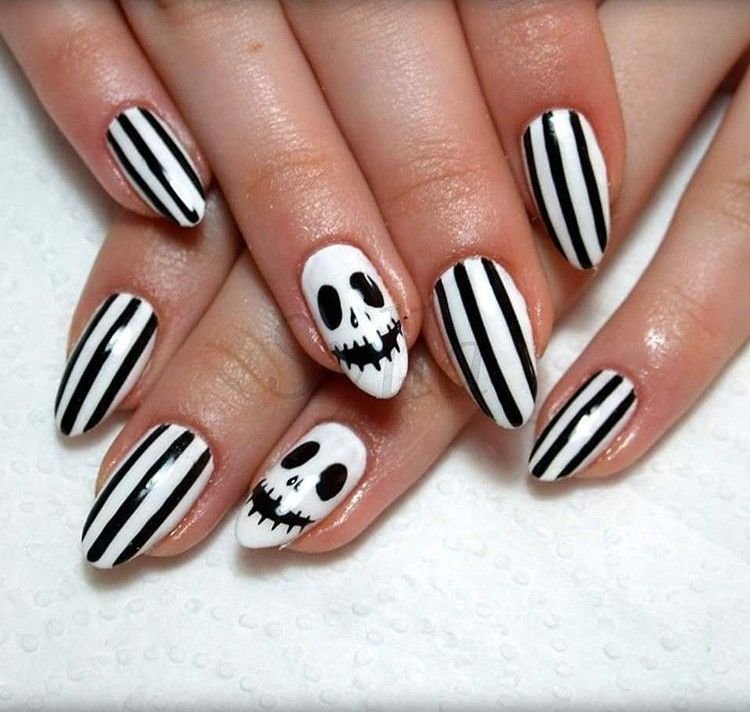
Skulls and Stripes pair skull artwork with stripe patterns for a manicure built around clear visual contrast. Straight lines can sit beside or behind the skull details, giving each nail a defined structure. Dark stripe work keeps the pattern graphic, while the skulls provide a recognizable Halloween image. Careful spacing between both elements prevents the artwork from becoming crowded across the nail surface.
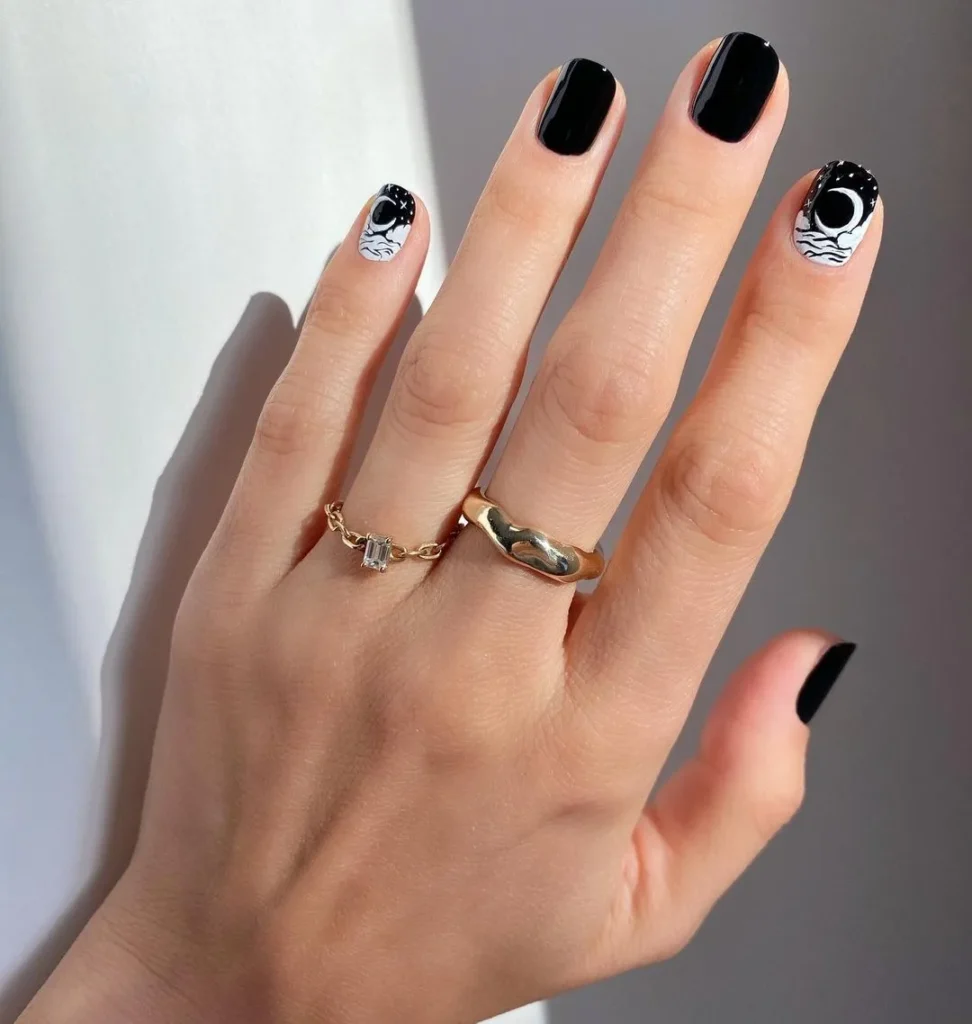
2. Moody Moons
Moody Moons center the manicure around moon imagery with a darker, more mysterious visual direction. Curved moon shapes give the nails a strong focal point without requiring a busy pattern. Different moon placements can change the balance from nail to nail while keeping the main image consistent. Clean edges around each moon help preserve the shape and make the curved details easy to see.
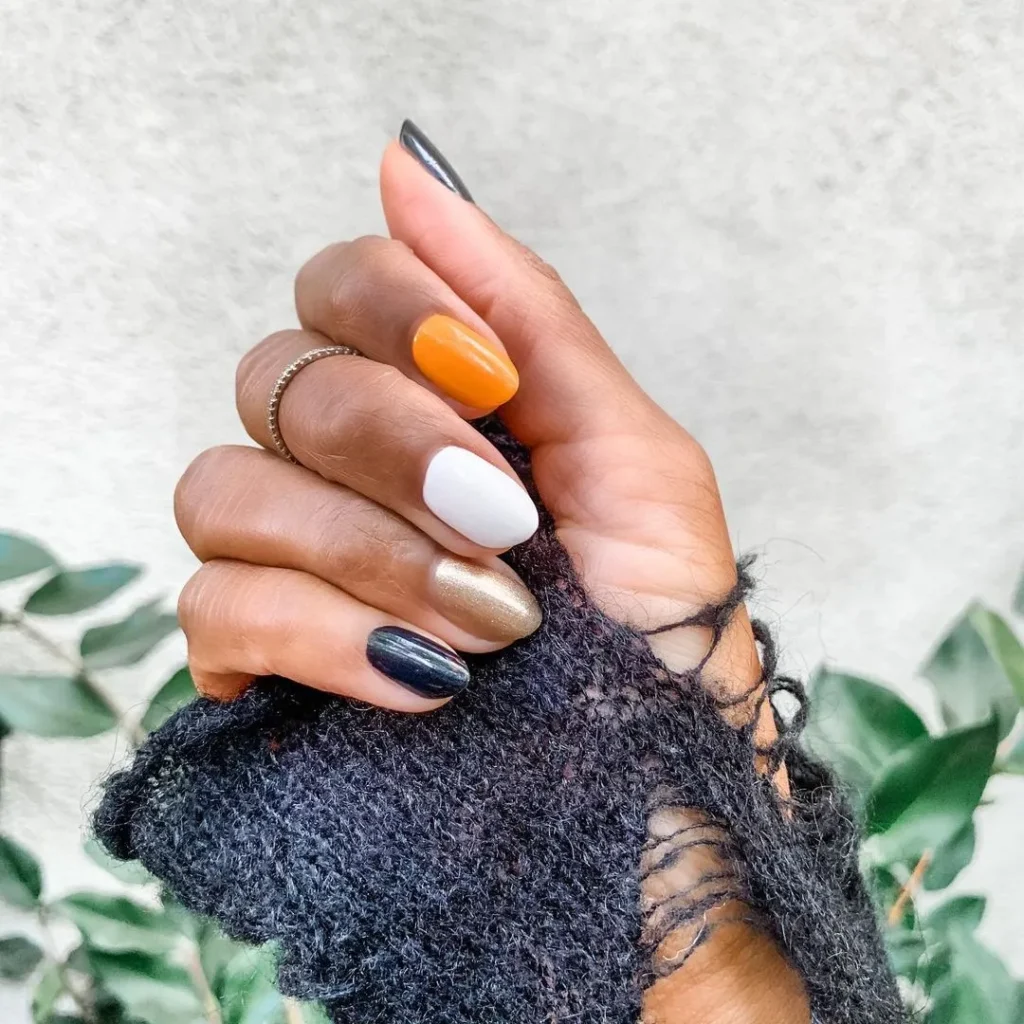
3. Candy Corn Tips
Candy Corn Tips place the familiar candy corn color pattern directly along the nail tips. Separate bands create the recognizable layered look while keeping the rest of each nail visually open. Narrow color sections can make the tip feel precise rather than heavy. Repeating the same three-part pattern across the manicure keeps the candy corn shape clear and gives every nail a consistent finish.
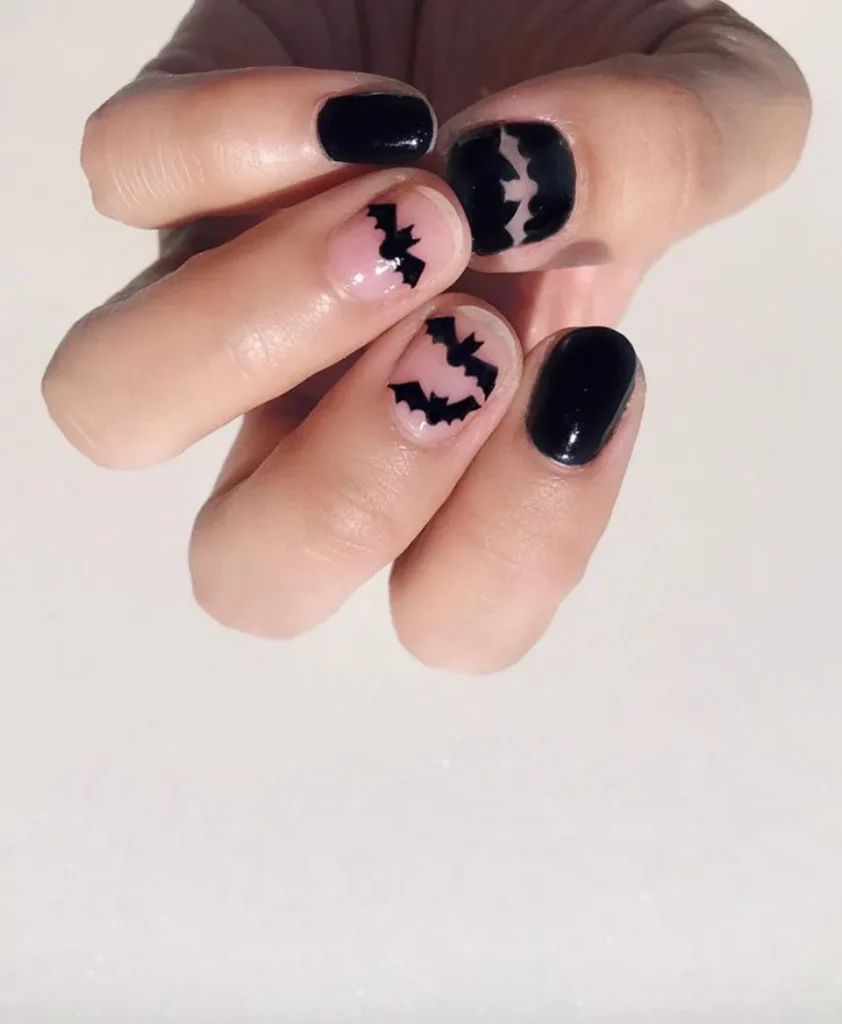
4. Mini Bats
Mini Bats use small bat silhouettes as the main artwork across the nails. Tiny wing shapes give each figure a clear outline while allowing several bats to sit across the nail without taking over the surface. Varied spacing can make the bats feel scattered rather than arranged in a rigid row. Small details matter most here, since clean silhouettes keep every bat recognizable at a glance.
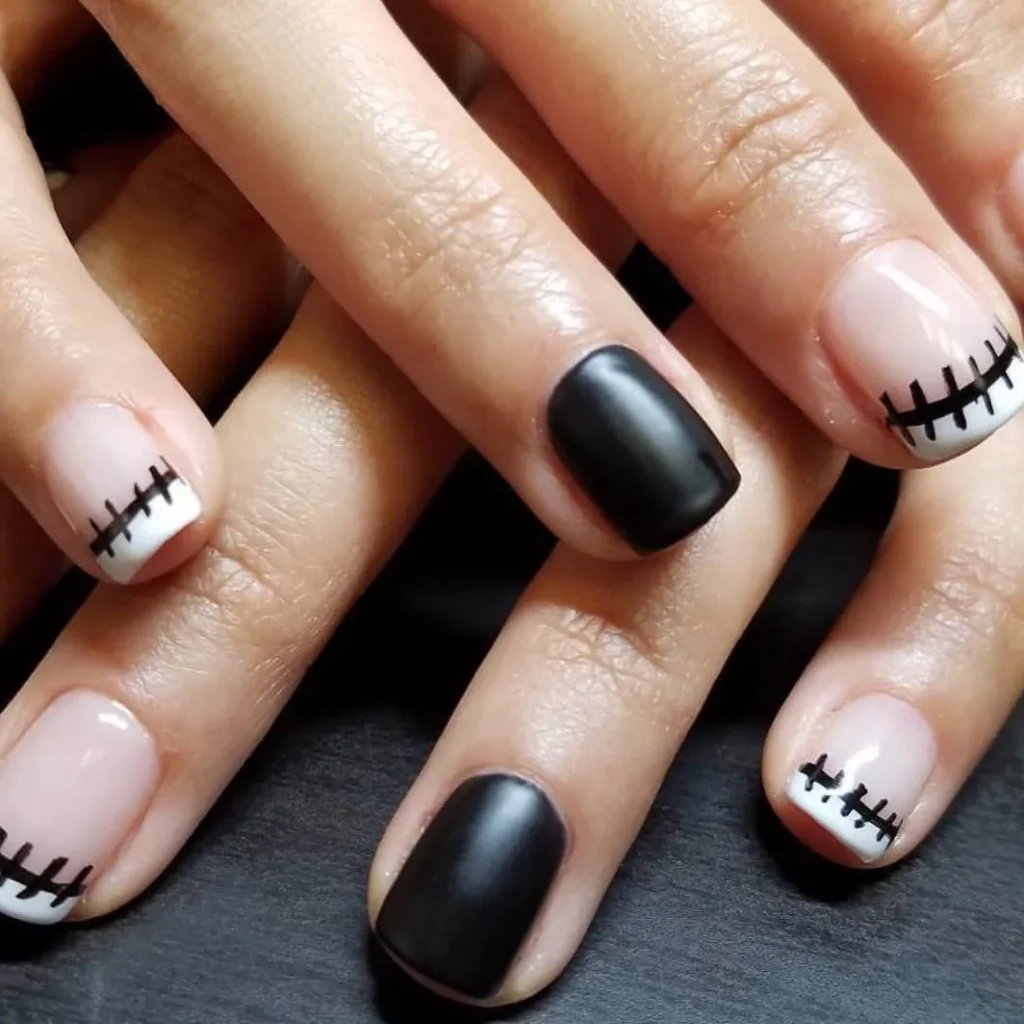
5. Stitched Tips
Stitched Tips turn the nail edges into the main focus with short stitch marks arranged along the tips. Even spacing gives the stitching a neat visual rhythm, while small gaps keep each mark separate. Curved placement can follow the natural edge of the nail instead of forming a straight band. Fine lines make the stitched effect easy to read without filling the entire nail.
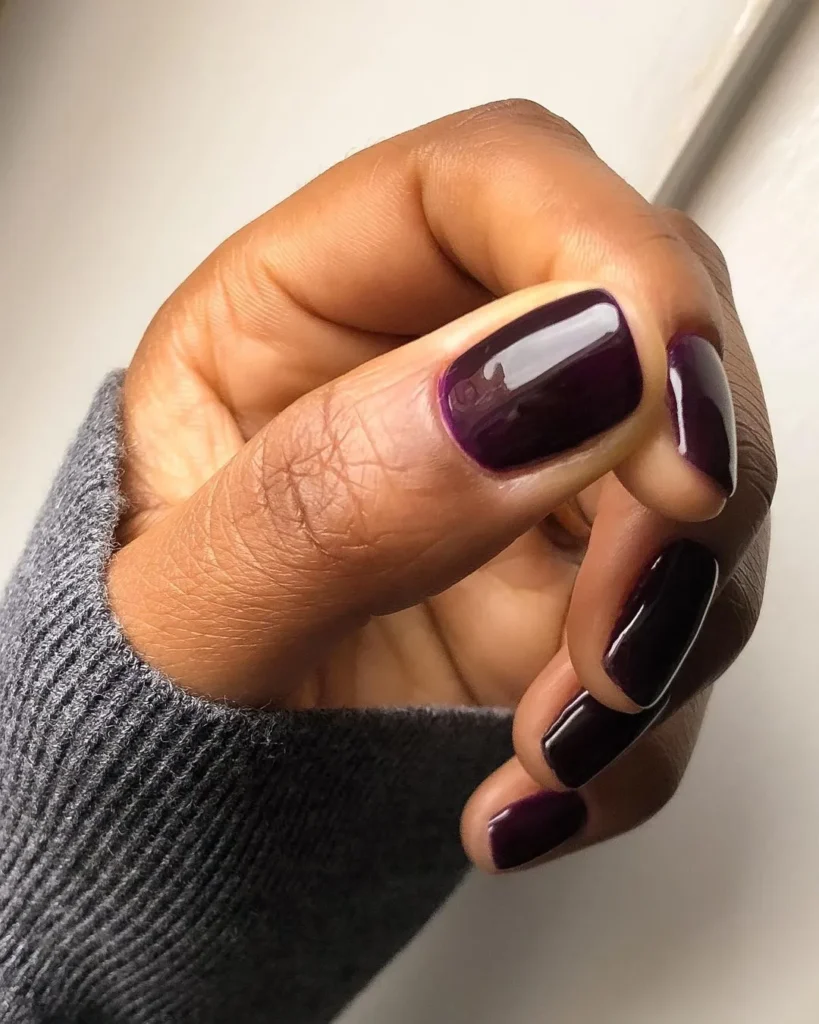
6. Deep Wine
Deep Wine centers the manicure on a rich wine-toned surface with a dark, solid color effect. Even coverage keeps attention on the depth of the shade rather than on extra decoration. Smooth application allows the color to look consistent from the base to the tip. Subtle shifts in light across the surface can reveal the darker and richer sides of the wine tone.
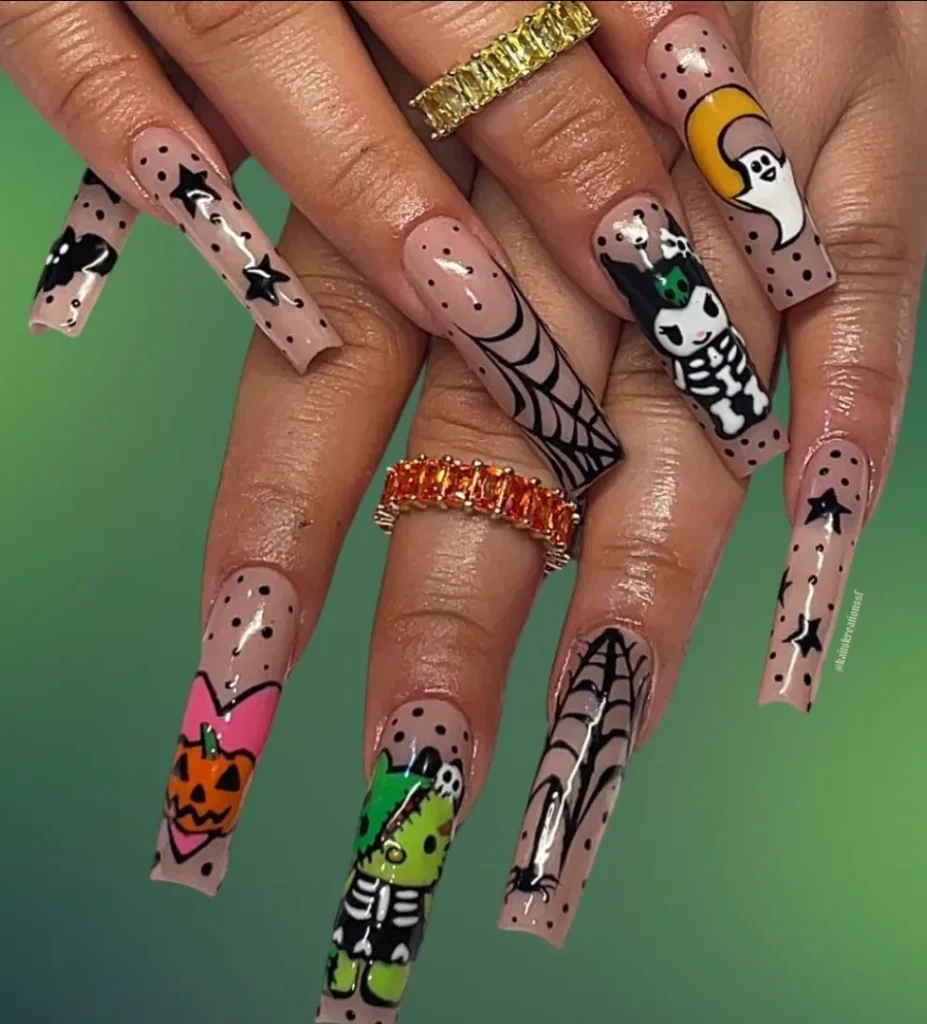
7. Multicolor Kawaii
Multicolor Kawaii brings several bright colors together through a playful manicure filled with small, cute visual details. Different colors can occupy separate nails so the palette feels varied without forcing every shade into one space. Rounded shapes support the soft kawaii look and keep the artwork easy to read. Balanced placement prevents the multicolor effect from becoming visually crowded across the manicure.
8. Lightning Storm
Lightning Storm uses sharp lightning shapes to create a manicure based on sudden lines and strong movement. Jagged bolts can travel across the nail surface in different directions, giving each nail its own visual path. Open areas around the bolts make the thin points easier to see. Repeated lightning imagery ties the manicure together while keeping the individual lines varied.
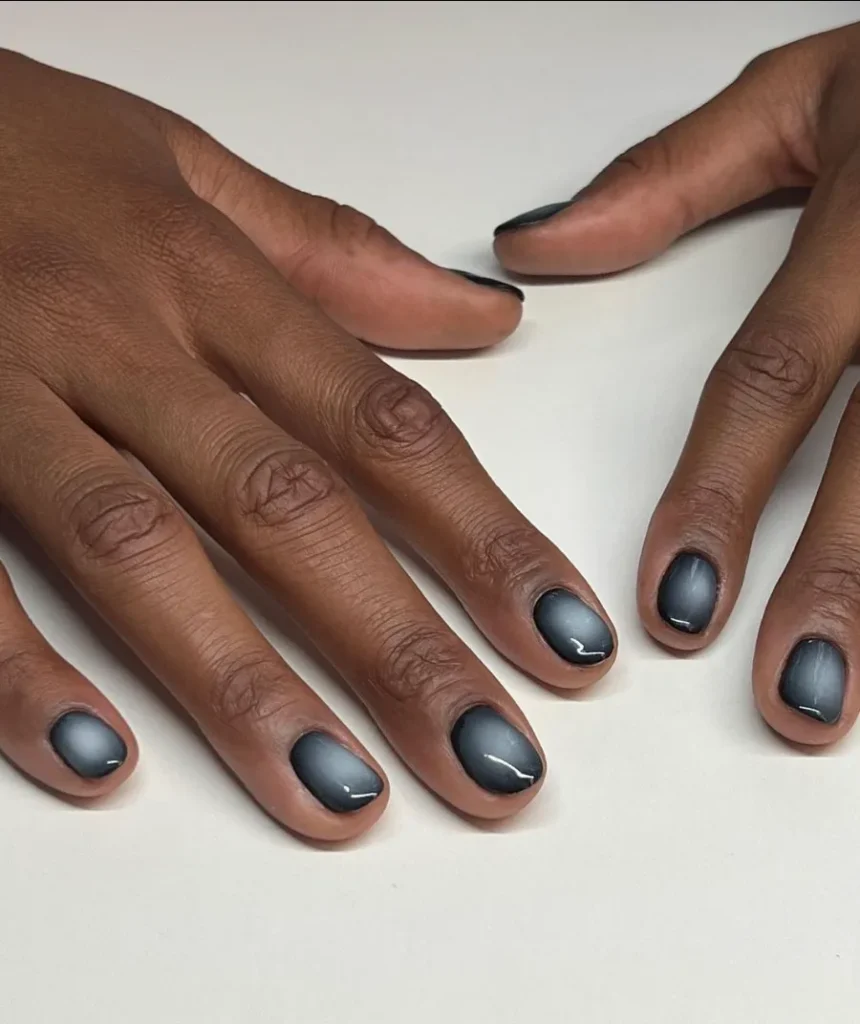
9. Haunted Forest
Haunted Forest brings tree shapes together in a dark scene built around narrow trunks and branching silhouettes. Layered trees can sit at different depths, giving the artwork a sense of distance across the nail. Uneven branch shapes keep the forest from looking too uniform. Small gaps between the silhouettes allow the individual trees to remain visible instead of merging into one dark mass.
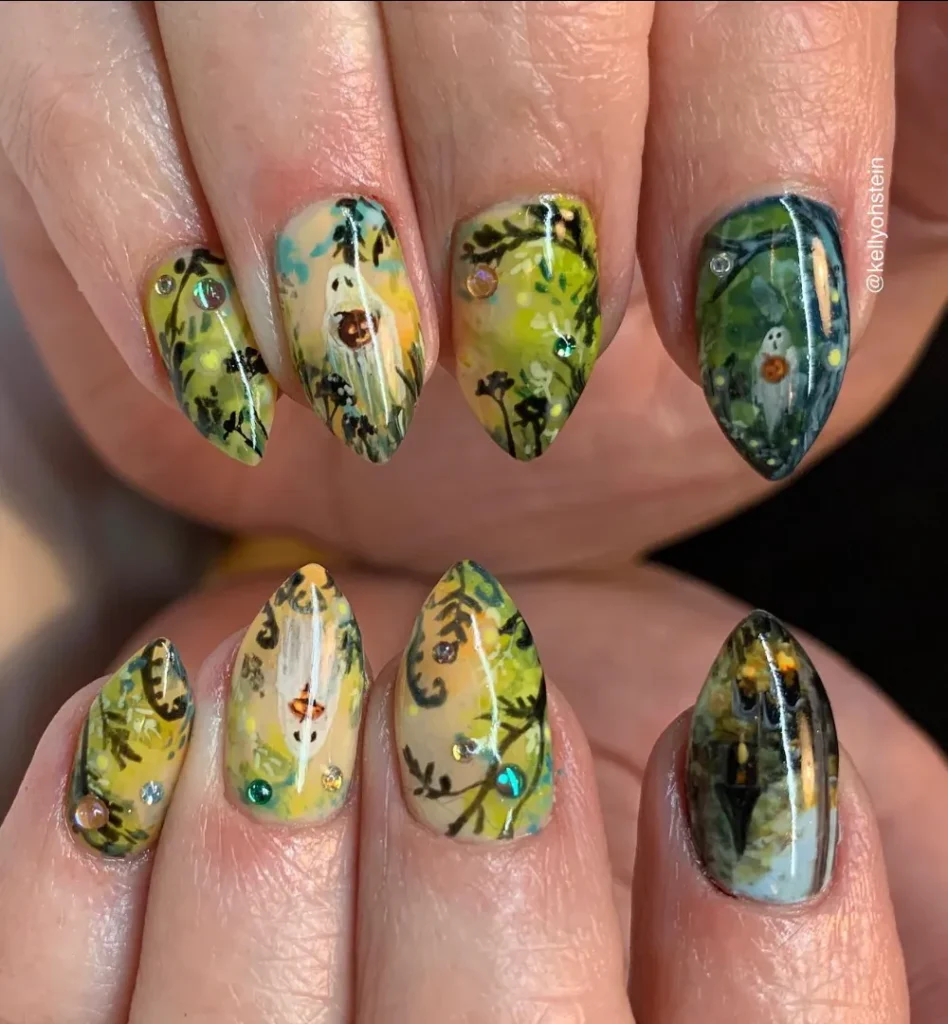
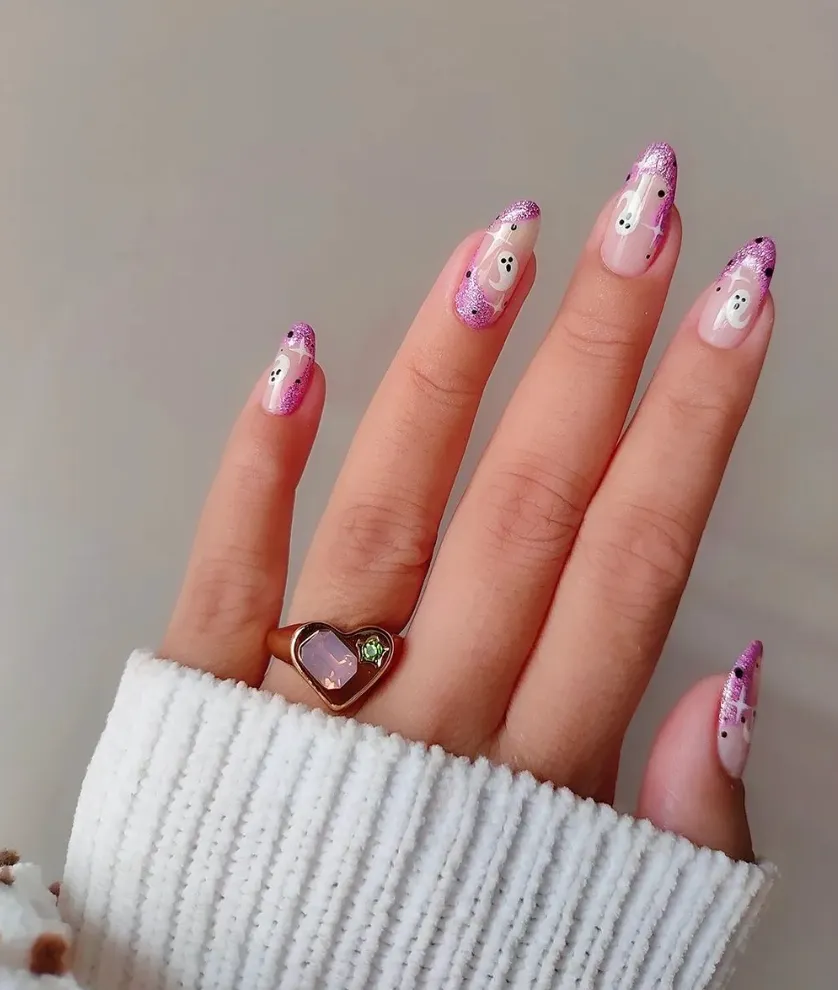
10. Pink Ghost
Pink Ghost changes the usual spooky mood through ghost artwork set against a pink base. Rounded ghost shapes give the figures a soft outline while keeping their familiar form easy to recognize. Small facial details can provide definition without filling the nail with extra artwork. Repeated ghost placement keeps the manicure connected, while the pink background shifts the overall look away from a darker palette.
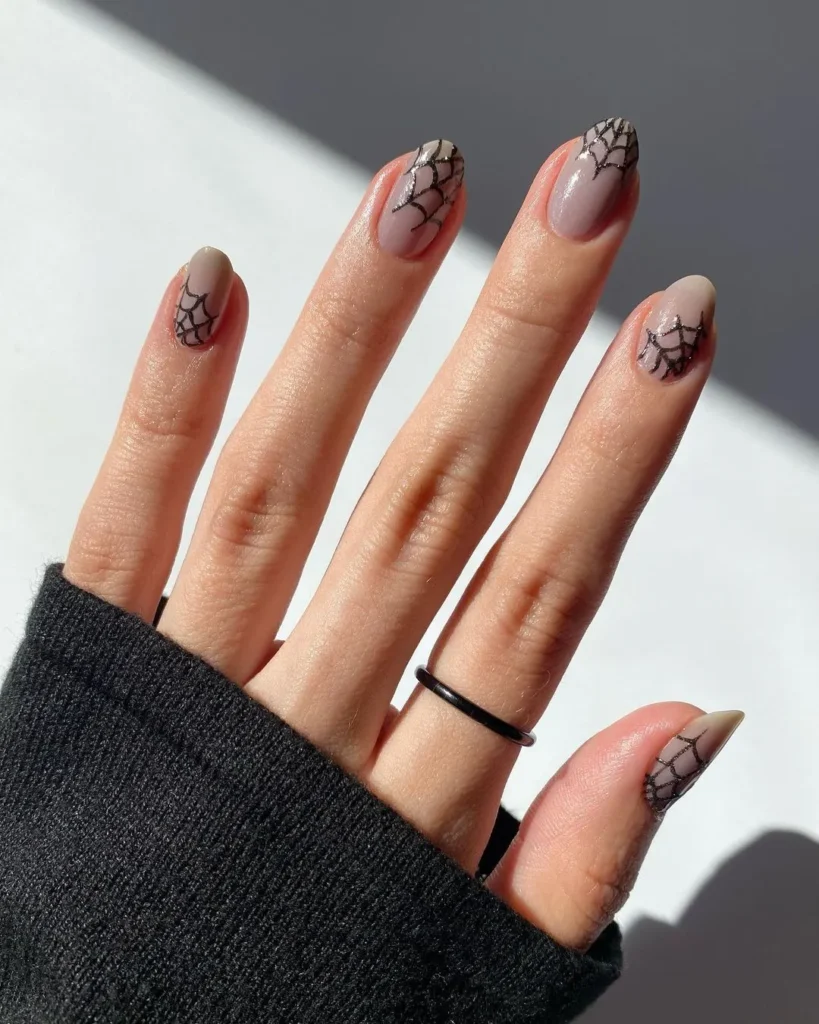
11. Spiderwebs
Spiderwebs use fine lines that spread outward from a central point to form the familiar web pattern. Curved connecting lines soften the straight radial structure and give the artwork its recognizable shape. Smaller webs can sit near the edges while larger ones occupy more of the nail surface. Precise spacing between each strand helps keep the pattern open and prevents the lines from merging.
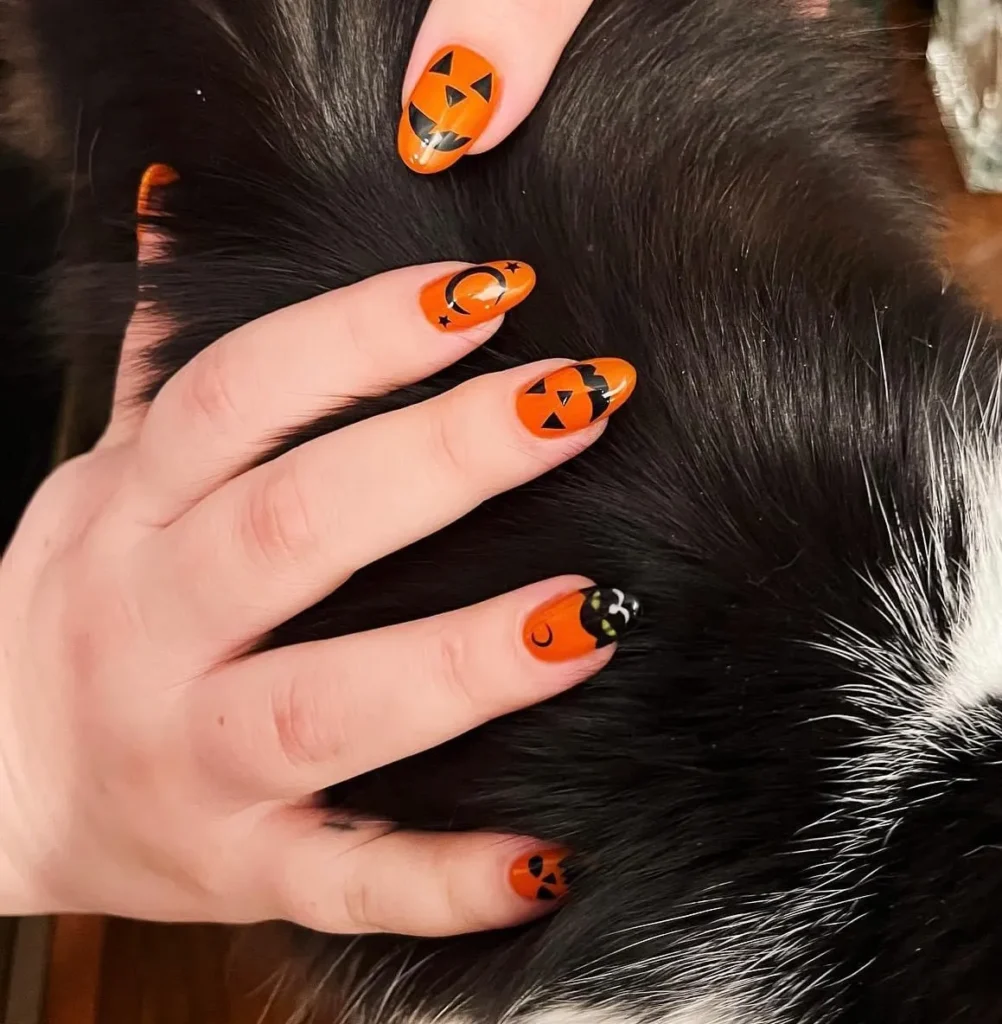
12. Jolly Jack-o’-Lantern
Jolly Jack-o’-Lantern puts carved pumpkin faces at the center of the manicure with simple expressions and clear shapes. Triangle eyes and curved mouths give each face an easy-to-read character without needing complex artwork. Slight changes in expression can keep repeated pumpkins from looking identical. Even placement across the nails helps the pumpkin faces remain distinct instead of blending into one pattern.
13. Witchy Wine
Witchy Wine combines a wine-toned nail look with a darker witch-inspired visual mood. Rich color gives the manicure a deep base while keeping the surface visually simple. Small witchy details can be placed selectively so they do not compete with the main wine shade. Careful contrast between the artwork and the base makes each detail easier to see without changing the dark character of the design.
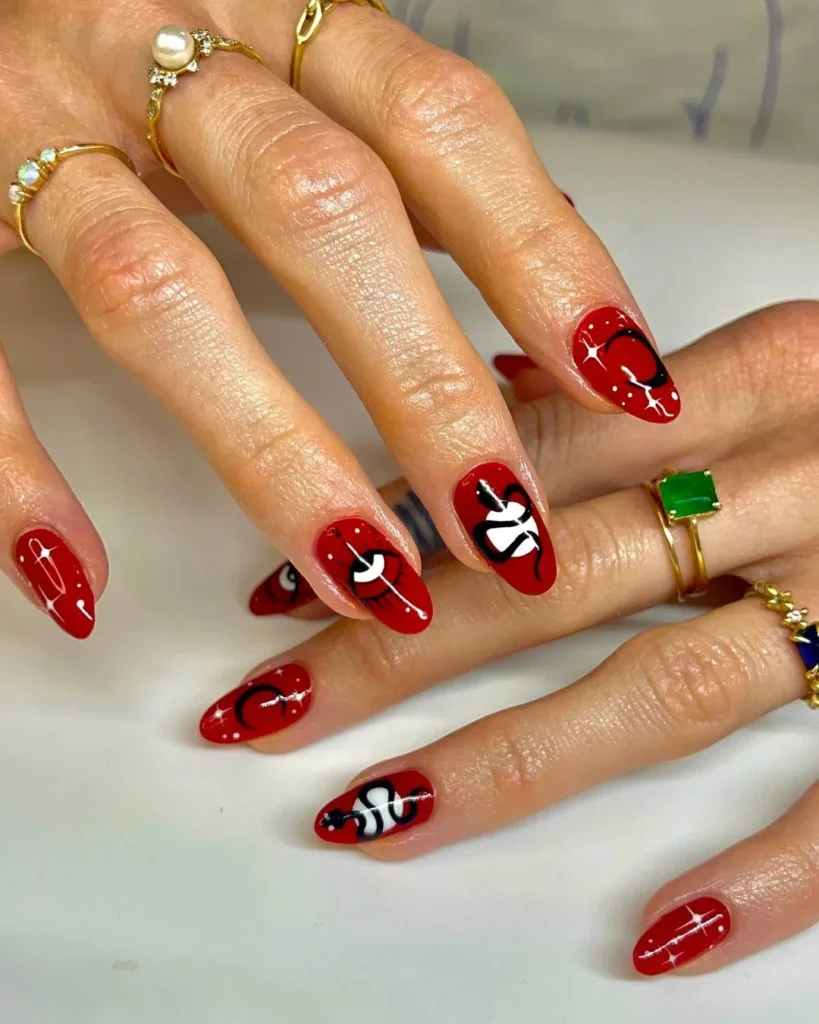
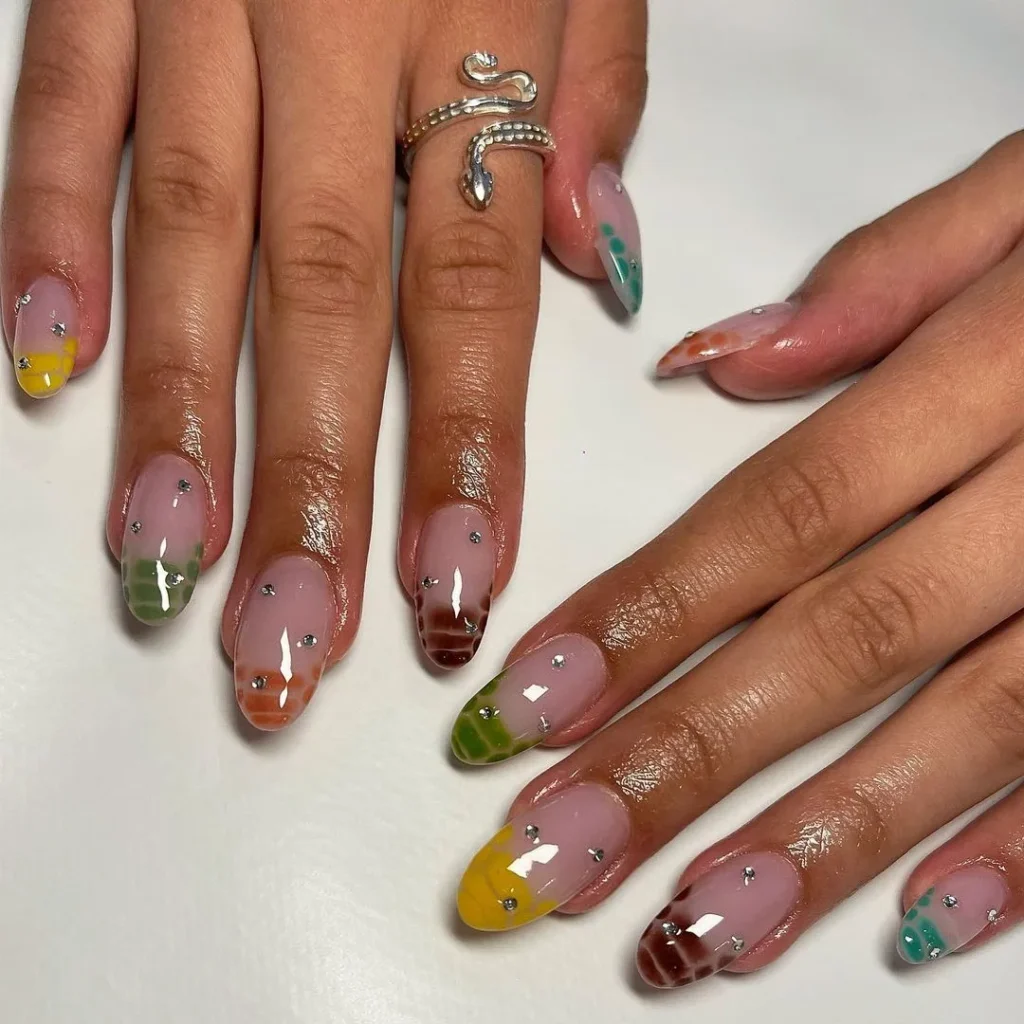
14. Snake Print
Snake Print uses repeating scale shapes to cover the nail surface with a clear reptile-inspired pattern. Overlapping sections give the scales their layered appearance while keeping the pattern continuous from one side to the other. Curved scale rows can follow the natural direction of the nail and create a smoother flow. Consistent spacing helps the print look deliberate rather than like a random collection of shapes.
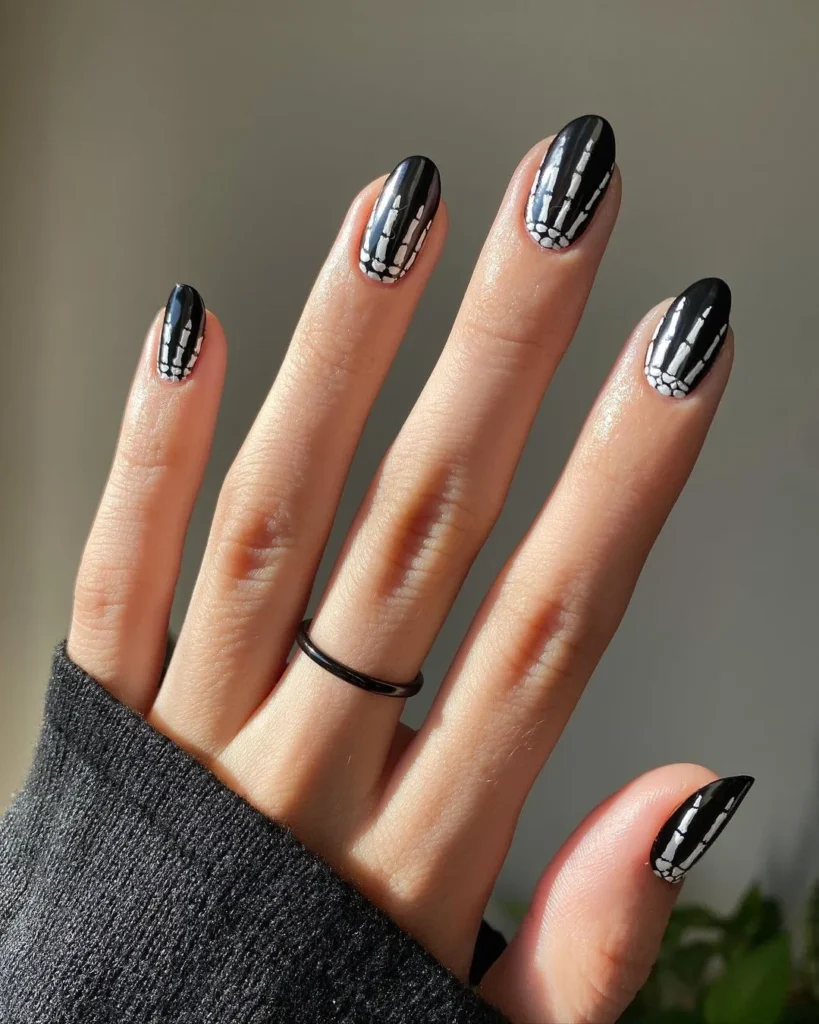
15. Skeleton Hands
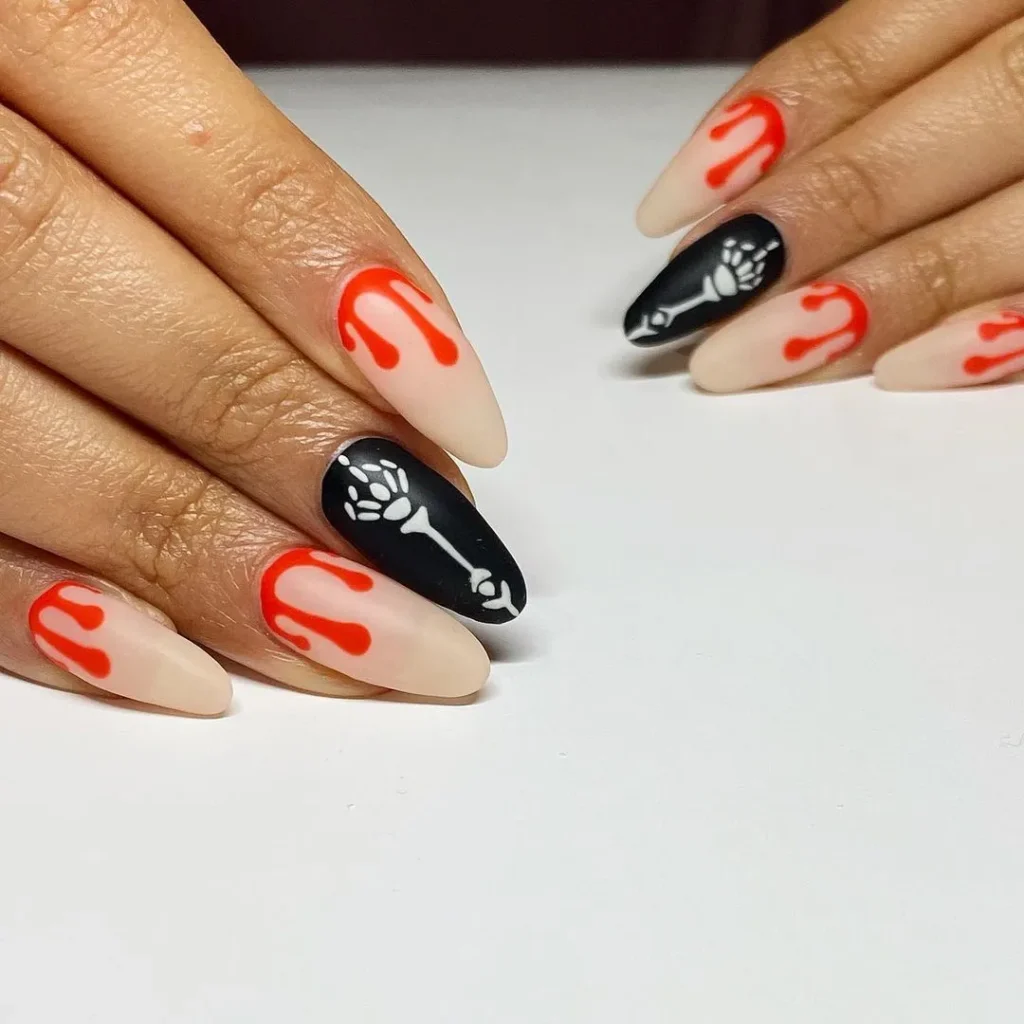
Skeleton Hands make bony hand shapes the central artwork, using thin finger forms and joint details for definition. Long finger lines give each hand a clear silhouette while small bone divisions add structure. Different hand positions can create visual movement across the manicure without changing the main subject. Fine outlines are especially important because they separate the fingers and keep the artwork readable.
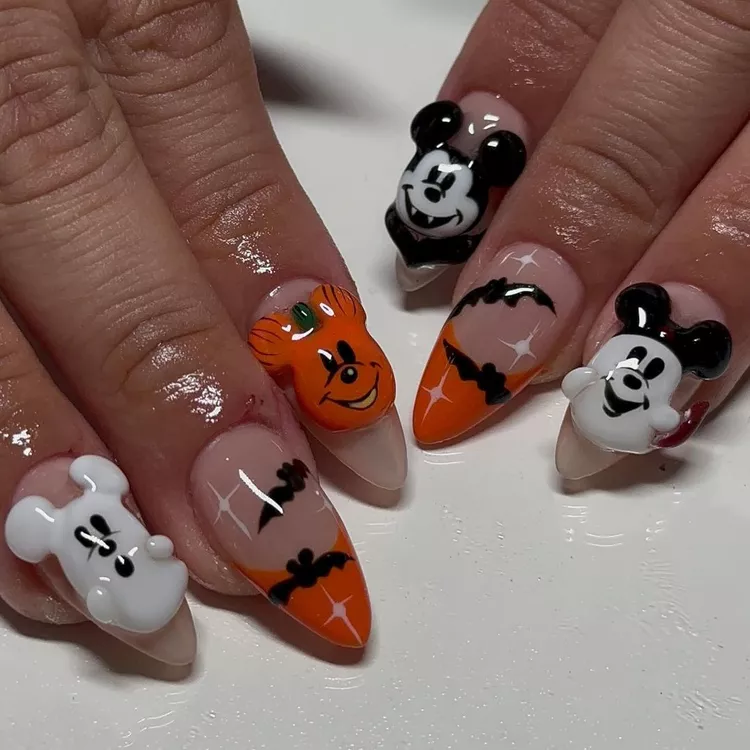
16. A Very Disney Hallloween
A Very Disney Hallloween brings Disney Halloween imagery into the manicure through recognizable character-inspired shapes and playful spooky details. Familiar silhouettes can act as the main focus while smaller accents fill open areas around them. Clear outlines help each figure stay readable at the small scale of a nail. Keeping the artwork separated from nail to nail prevents multiple character details from visually running together.
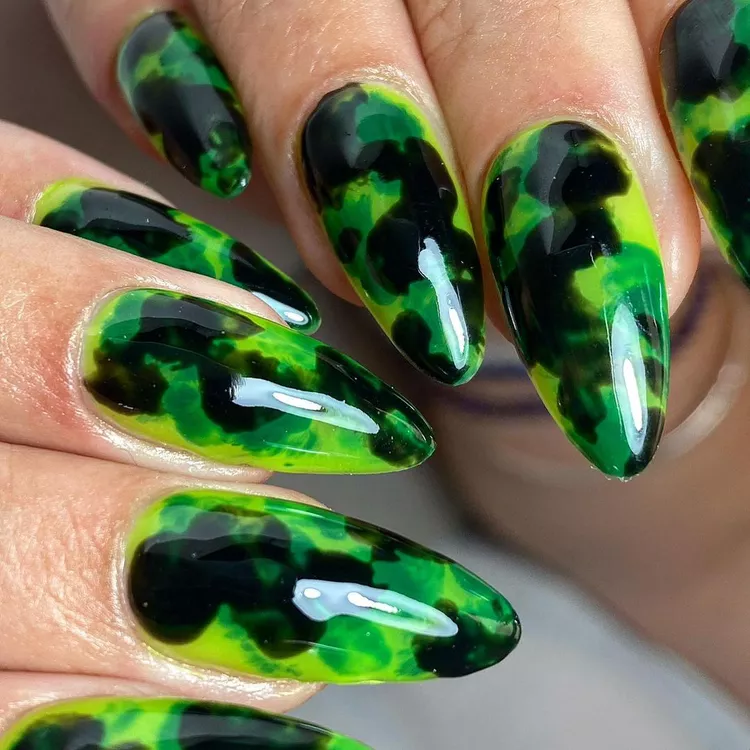
17. Toxic and Iconic
Toxic and Iconic centers on a poisonous, Halloween-inspired visual theme with strong toxic imagery across the nails. Sharp symbols and concentrated details can give the artwork a graphic feel without requiring a crowded surface. Repeated elements create a connection between separate nails while leaving enough open space around each mark. Clear contrast keeps the toxic theme easy to identify from a quick view.
18. Trick or Treat!
Trick or Treat! turns the familiar Halloween phrase into the main visual element of the manicure. Lettering can sit across individual nails or appear as a focused accent while keeping each word easy to read. Strong spacing prevents the letters from becoming cramped on the narrow nail surface. Small breaks between words can also give the phrase a playful rhythm without adding unrelated artwork.
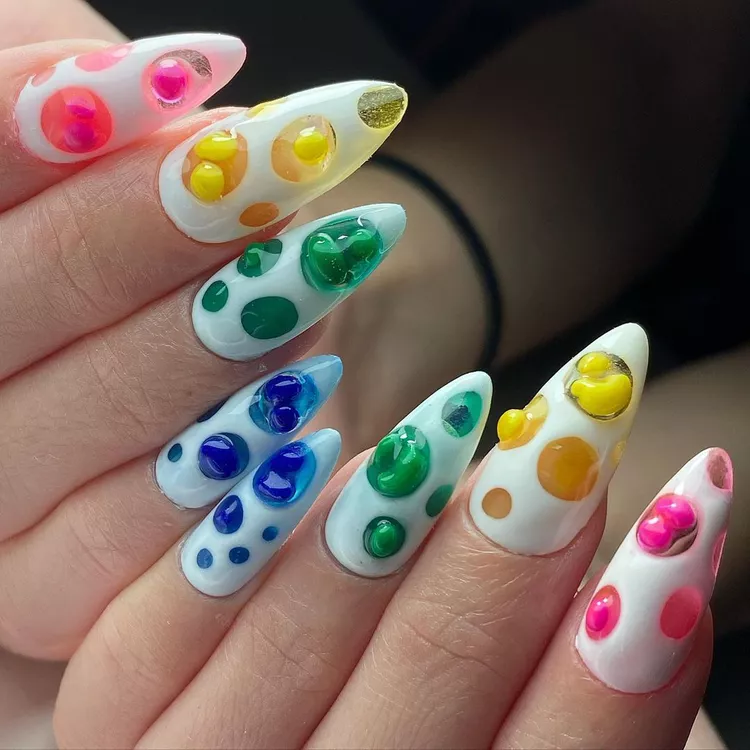
19. Claws
Claws focus on pointed claw imagery that gives the manicure a sharp, graphic character. Long curved marks can stretch across the nail surface and suggest the shape of a scratch without adding extra subjects. Uneven placement makes the marks feel less rigid and more natural. Keeping each claw line distinct preserves the sense of movement and prevents the artwork from becoming one heavy block.
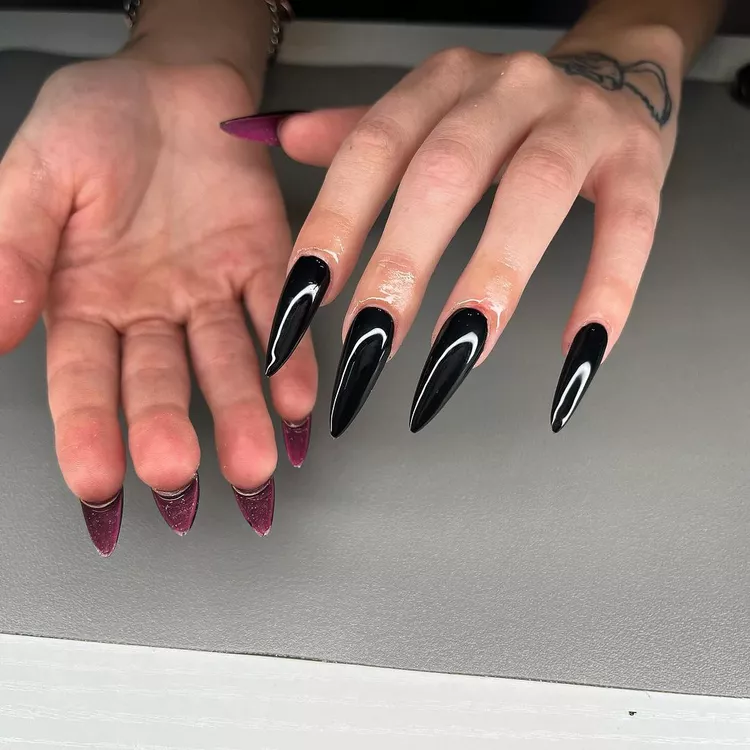
20. Cat-Eye
Cat-Eye centers on the narrow, reflective band associated with a cat-eye effect across the nail surface. A focused line of light gives the color depth while shifting as the surface catches different angles. Smooth surrounding color keeps attention on the central reflection rather than on added decoration. Strong contrast between the bright band and darker surrounding area makes the cat-eye effect easy to recognize.
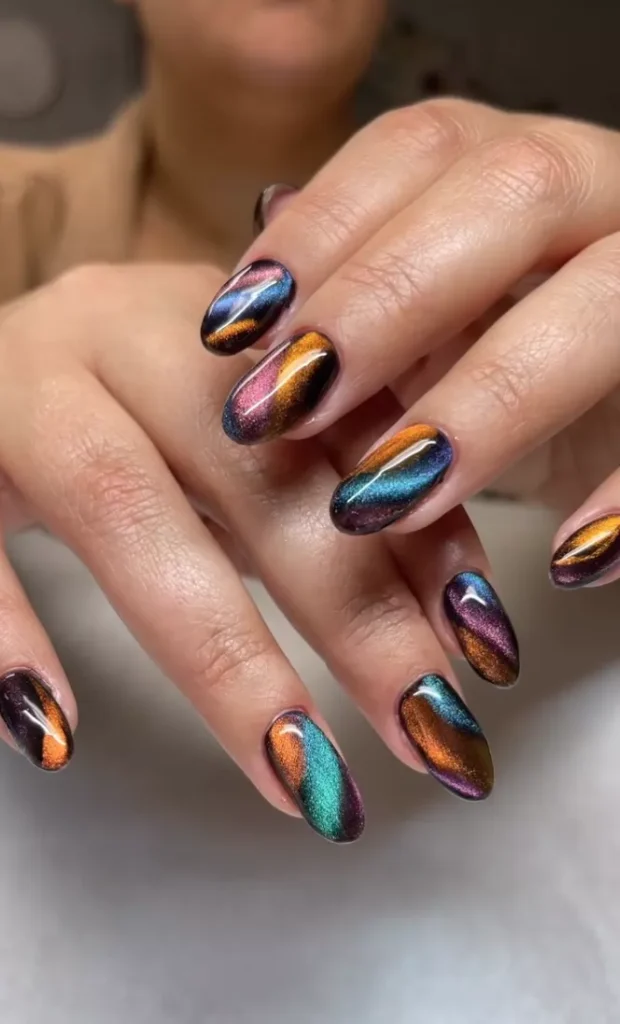
21. Nighttime Sparkle
Nighttime Sparkle brings small points of shimmer across a manicure inspired by the dark look of a night sky. Scattered sparkle can vary in size so the surface does not appear evenly dotted. Concentrated areas create subtle changes in visual weight across the nails. Leaving some sections quieter gives the brighter points more separation and keeps the sparkle effect from becoming flat.
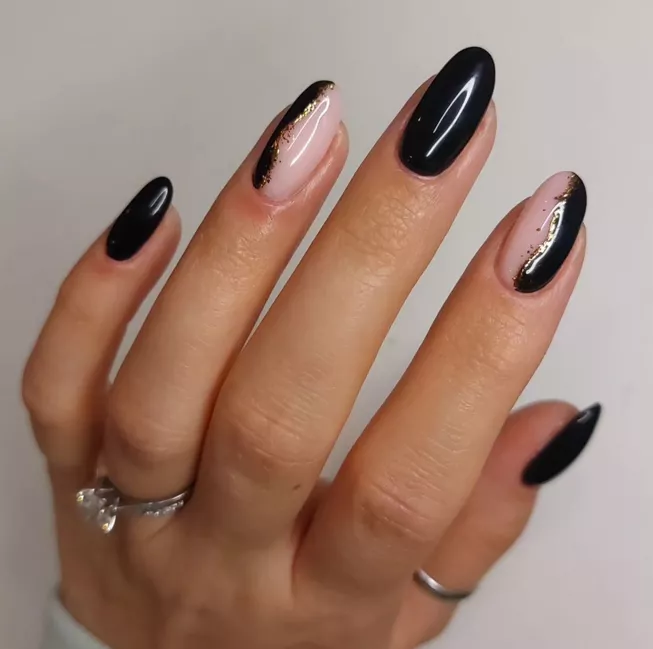
22. Poison Ivy
Poison Ivy uses ivy-like leaves and curling plant forms as the main decorative subject. Narrow stems can move across the nail while leaves branch away in different directions. Layered placement gives the vines a sense of depth without requiring a dense background. Fine leaf outlines help separate overlapping shapes and keep the plant pattern readable from the base toward the tip.
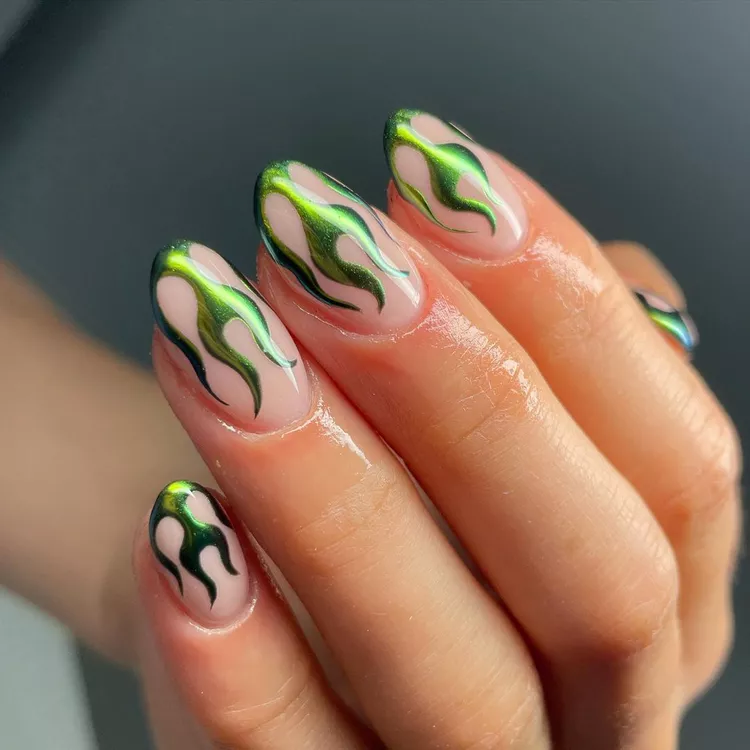
23. October Leaves
October Leaves place leaf shapes across the nails in a pattern tied to the visual character of October. Individual leaves can vary in size and direction, giving the surface a more natural arrangement. Vein lines add small areas of detail inside each leaf without changing the simple overall subject. Spacing between leaves keeps the manicure from looking like one continuous block of artwork.
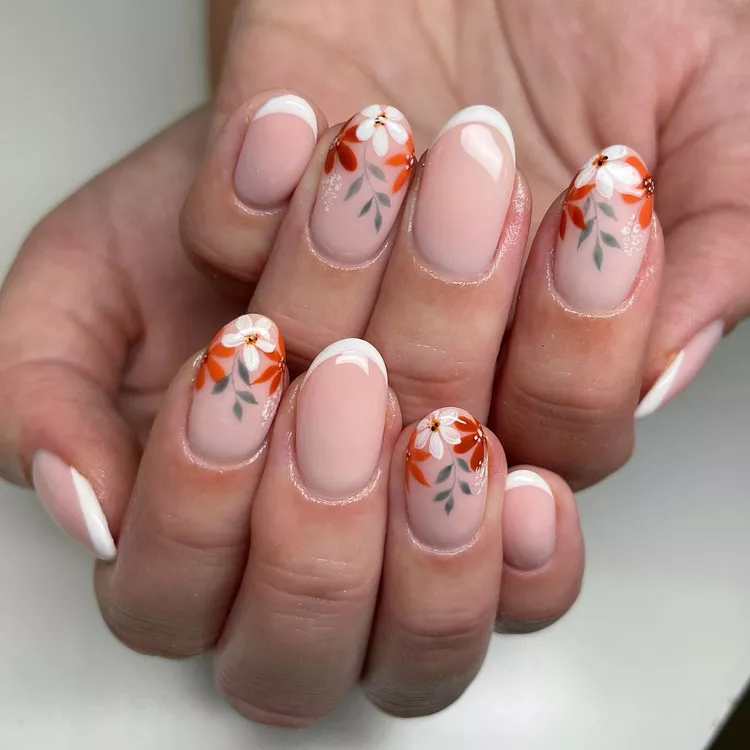
24. Blood and Spiders
Blood and Spiders combine two distinct Halloween images, using spider shapes alongside blood-like marks across the nail surface. Spider legs provide thin lines and delicate structure, while the heavier marks create a stronger visual contrast. Separating the two elements helps each subject remain recognizable instead of overlapping into one shape. Varied placement can also give some nails a spider focus and others a stronger blood detail.
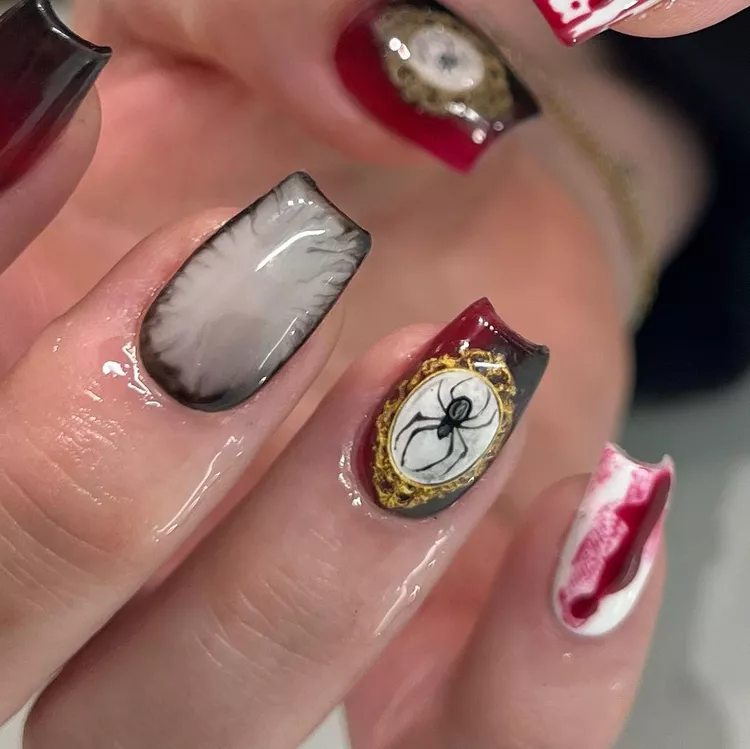
25. Goth Glam
Goth Glam centers on a dark gothic look with polished decorative details and a strong sense of contrast. Deep visual weight can sit beside smaller accents so the manicure feels layered without becoming crowded. Clean lines keep the darker artwork defined across each nail. Subtle surface variation can add depth while allowing the main gothic theme to remain the clearest part of the manicure.
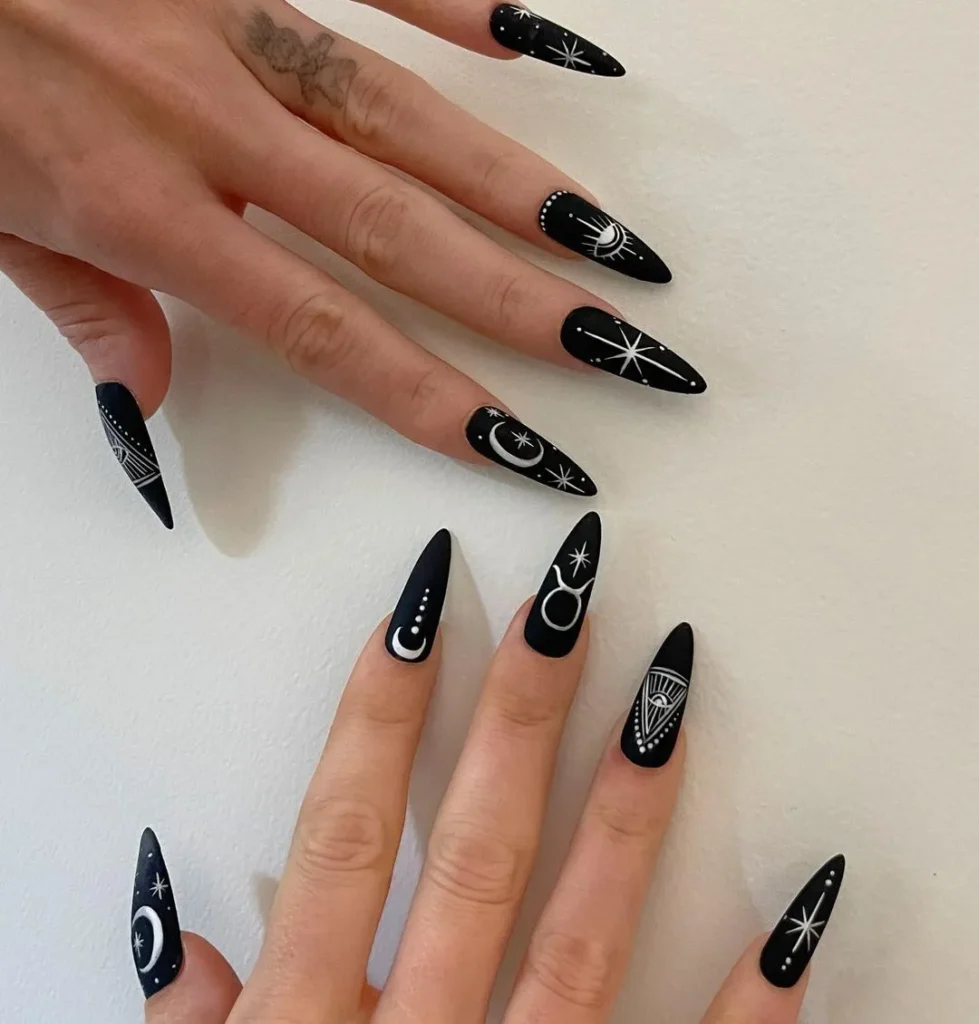
26. Gothic Romance
Gothic Romance pairs dark gothic imagery with softer romantic details across the manicure. Curved shapes can bring a gentler line quality to artwork that otherwise feels dark and dramatic. Layering allows the two moods to sit together without one completely covering the other. Open areas between decorative elements give each shape room to remain visible and keep the composition balanced.
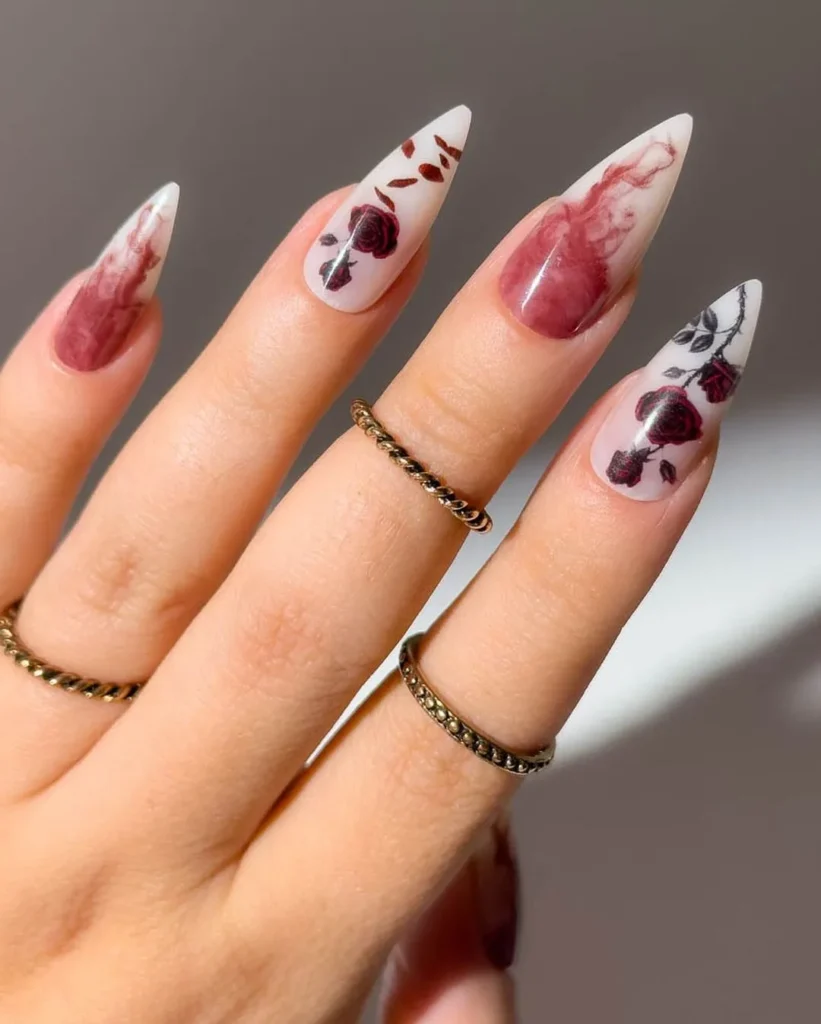
27. Crimson Chrome
Crimson Chrome combines a deep crimson color with a reflective chrome surface that changes under light. Metallic reflection gives the red base a smooth, mirror-like quality across the nail. Bright highlights can appear along curved areas while darker sections show more depth. Keeping the surface even allows the chrome effect to remain the main visual detail rather than competing with additional artwork.
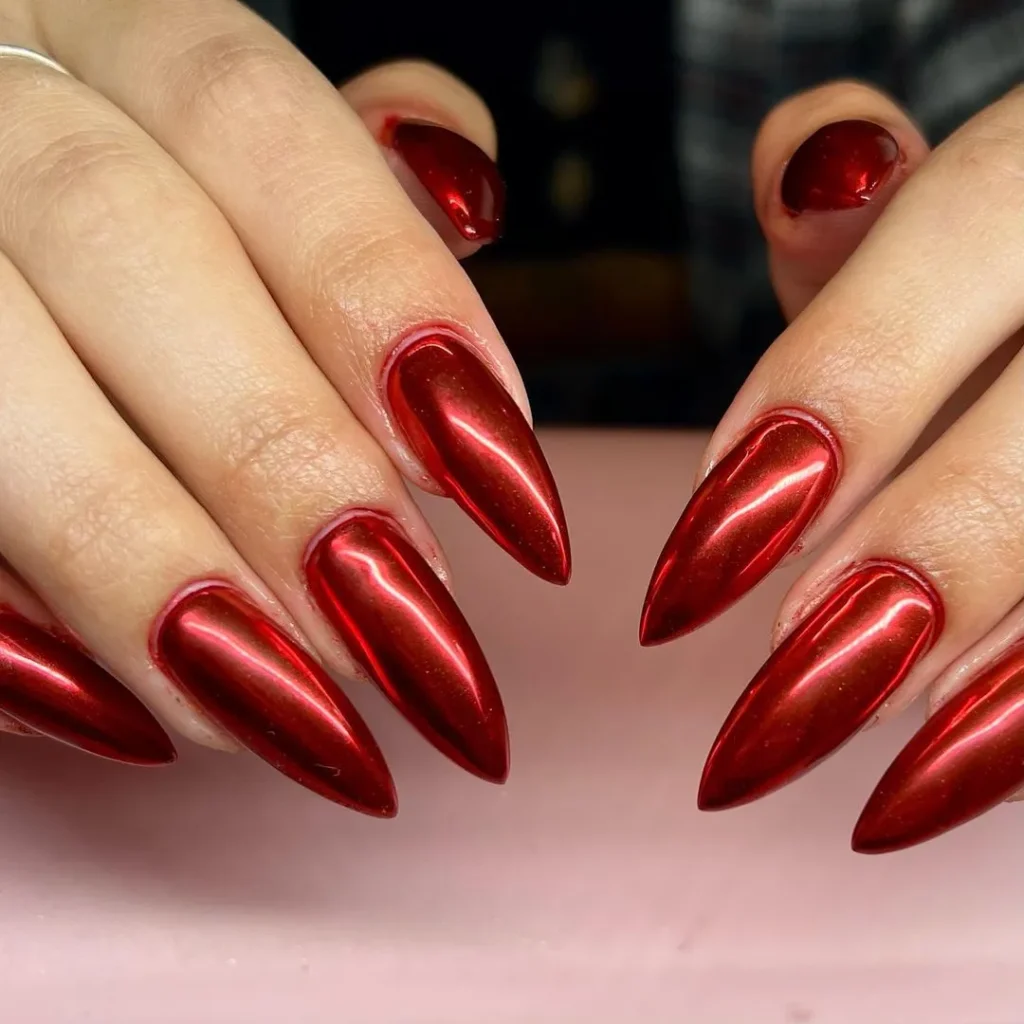
28. Scarlett Serpents
Scarlett Serpents place serpent imagery against a scarlet-focused manicure, giving the snakes a strong visual presence. Curved bodies can travel across the nail in winding paths while smaller details define the shape of each serpent. Repeated snake forms can vary in direction to avoid a stiff layout. Clear separation around each figure helps the serpents remain distinct from the surrounding color.
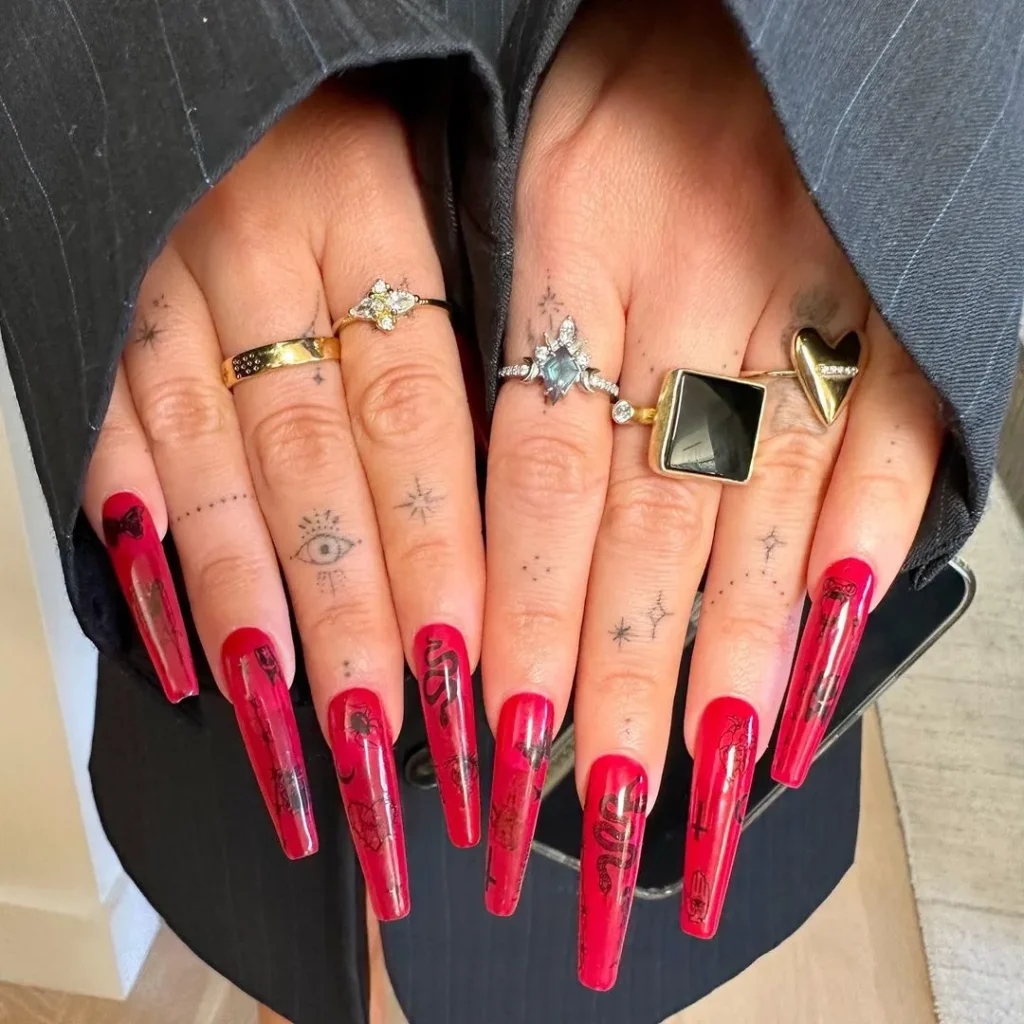
29. Lilac Jack-o’-Lantern
Lilac Jack-o’-Lantern gives pumpkin faces a lilac setting that changes the usual Halloween color direction. Carved eyes and mouths remain the main details, with simple shapes keeping each face easy to identify. Repeated pumpkin faces can vary slightly in expression while maintaining the same basic structure. The soft lilac color provides a clear background for the darker facial details without adding unrelated decoration.
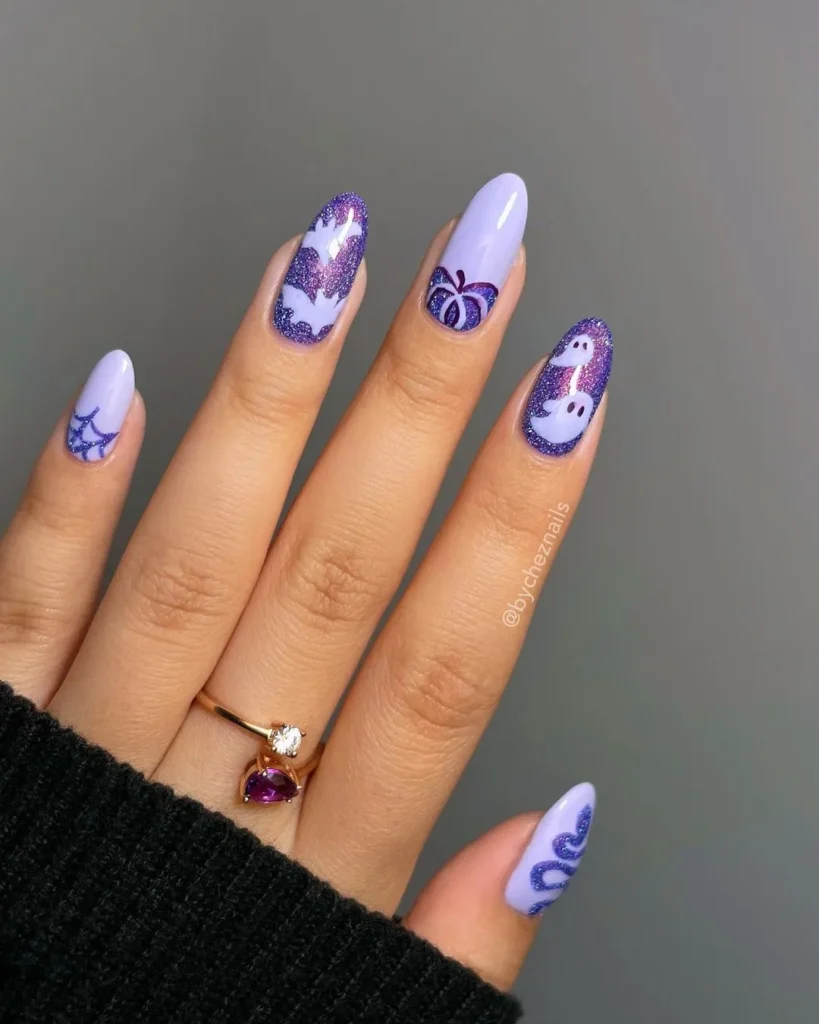
30. Spooky Mix & Match
Spooky Mix & Match brings different Halloween subjects together by giving separate nails their own spooky artwork. One nail can carry a distinct image while another uses a different pattern, creating variety across the manicure. Keeping a shared Halloween mood helps the separate designs feel connected rather than random. Uneven visual weight can make the manicure more playful while still leaving each individual nail easy to read.
Conclusion
Festive manicures do not need elaborate artwork to make an impression. Color contrast, glossy textures, metallic accents, and unexpected finishes can give Halloween Nail Ideas plenty of character while keeping the overall appearance refined. Some styles lean playful, others feel dramatic, and minimalist options offer a cleaner alternative for anyone who prefers understated details. The best choices ultimately come down to personal style, nail shape, and how bold you want your seasonal manicure to feel.