Winter is the perfect season to enjoy creative DIY projects that bring warmth, joy, and festive charm into your home. Whether you’re decorating for Christmas, hosting a holiday party, or simply looking for a fun weekend activity with your family, handmade decorations always add a special personal touch. Among the many winter crafts available, a Creative Winter Craft: DIY Snowman Made from Plastic Cups stands out as one of the most impressive yet affordable projects you can create. It transforms simple disposable cups into a beautiful three-dimensional snowman that looks surprisingly realistic and instantly becomes the centerpiece of your seasonal décor.
One of the biggest reasons this craft has become so popular is its simplicity. You don’t need advanced crafting skills, expensive tools, or professional experience. With a little patience and careful assembly, almost anyone can build a snowman that looks festive and welcoming. Families often enjoy making one together during the holiday season, while teachers use it as a classroom decoration and event organizers display it during winter celebrations. Since the finished snowman is lightweight, reusable, and easy to customize, it can be enjoyed year after year without much maintenance.
Another wonderful feature of this project is its flexibility. You can build a small tabletop snowman using around one hundred cups or create a life-sized decoration using more than three hundred cups. Every snowman can be personalized with different scarves, hats, buttons, ribbons, LED lights, or handmade accessories, making each creation unique. Whether your decorating style is traditional, modern, rustic, or colorful, this craft can easily match your theme.
In this complete guide, you’ll learn everything you need to know about creating a Creative Winter Craft: DIY Snowman Made from Plastic Cups. From selecting the right materials and planning the size to assembling each section correctly and decorating the finished snowman, every step is explained in detail to help you achieve excellent results.
READ ALSO: How to Decorate Your Home Using Dollar Store Items
Why Make a DIY Snowman Made from Plastic Cups?
Making holiday decorations by hand is much more rewarding than simply buying ready-made decorations from a store. A DIY project allows you to express your creativity while creating something meaningful that reflects your own style. A snowman made from plastic cups is especially popular because it combines affordability, creativity, and festive beauty in one enjoyable activity.
Unlike traditional snowmen that melt once temperatures rise, this version can be displayed throughout the winter season and safely stored for many years. Once completed, it becomes a decoration you can bring out every holiday season without rebuilding it from scratch. This not only saves money but also creates family memories as your handmade decoration becomes part of your annual traditions.
Another reason people love this project is that the materials are inexpensive and widely available. Most of the supplies can be found at local grocery stores, party supply shops, craft stores, or even at home if you already have leftover disposable cups from previous events. Because the overall cost is relatively low, it’s an ideal craft for schools, community centers, church groups, and families looking for budget-friendly holiday activities.
Building the snowman is also an excellent opportunity to spend quality time with loved ones. Children enjoy handing over cups, choosing decorations, and designing the snowman’s face, while adults handle the stapling and structural assembly. This teamwork makes the crafting process just as enjoyable as displaying the finished decoration.
The project also encourages problem-solving and creativity. As you build the snowman, you’ll learn how simple geometric shapes come together to form a stable sphere. You’ll also have countless opportunities to personalize your design with unique accessories, facial expressions, and decorative elements that reflect your personality.
Some of the biggest benefits include:
- Affordable holiday decoration.
- Fun family bonding activity.
- Suitable for classrooms and schools.
- Reusable for multiple winters.
- Easy to customize with different themes.
- Lightweight and portable.
- Excellent indoor decoration.
- Beginner-friendly project.
- Encourages creativity and teamwork.
- Creates lasting holiday memories.
Materials You’ll Need
Preparing all of your materials before you begin will make the entire building process much smoother. Having everything ready allows you to focus on assembling the snowman without constantly stopping to search for missing supplies. Although this craft looks impressive once completed, it actually requires only a handful of basic materials that are easy to find.
White Plastic Cups
The most important material is, of course, the plastic cups themselves. These cups form the entire structure of your snowman, so choosing the right type is essential. White disposable plastic cups create the classic snowy appearance and require no painting. Medium-sized cups generally work best because they provide a good balance between stability and flexibility during assembly.
If you’re planning to make a large standing snowman, you’ll typically need between 250 and 350 cups. A medium-sized snowman may require around 180 to 250 cups, while a smaller tabletop version can often be completed with approximately 120 to 150 cups. Purchasing a few extra cups is always a smart idea in case any become damaged during the construction process.
Choose cups that are sturdy enough to hold their shape. Very thin cups may bend or collapse, making it difficult to build smooth, even spheres.
Stapler and Staples
A standard office stapler is the primary tool used to connect the cups together. Since every cup must be attached to its neighboring cups, you’ll use the stapler many times throughout the project. Make sure you have plenty of staples available before starting, especially if you’re building a large snowman.
While stapling may seem repetitive, it provides a strong connection that keeps the structure secure. Each staple helps distribute weight evenly across the snowman, allowing it to maintain its round shape.
Some crafters also use heavy-duty staplers for larger projects, but a regular stapler works perfectly for most home decorations.
Hot Glue Gun (Optional)
Although staples provide the main support, a hot glue gun can strengthen certain areas of the snowman. Many people use hot glue when attaching decorative accessories such as buttons, hats, scarves, ribbons, or the carrot nose.
Glue is particularly helpful if you plan to move the snowman frequently or transport it to holiday events. It prevents accessories from shifting or falling off over time.
However, hot glue should always be handled carefully. Children should never use a glue gun without close adult supervision because the melted glue becomes extremely hot.
Black Craft Foam or Construction Paper
Your snowman’s personality comes from its facial features. Black craft foam is an excellent material because it is lightweight, flexible, and durable.
You can use it to create:
- Round eyes
- A smiling mouth
- Large buttons
- Decorative eyebrows
- Eyelashes
- Hat decorations
Foam is generally more durable than construction paper, especially if you plan to reuse the snowman for several years.
Orange Paper or Foam Sheet
No snowman is complete without a bright orange carrot nose.
You can easily make one by rolling orange construction paper into a cone shape and securing it with glue. Foam sheets also work well because they maintain their shape better over time.
The nose becomes the focal point of the snowman’s face, so choose a size that complements the overall proportions of the head.
Winter Accessories
Accessories give your snowman personality and make it feel warm and festive.
Popular choices include:
- Colorful scarves
- Wool hats
- Santa hats
- Top hats
- Ear muffs
- Mittens
- Decorative ribbons
- Fabric bows
- Bells
- Holiday ornaments
These decorations allow you to match your snowman to your existing holiday décor or create a unique style.
READ ALSO: Slim vs. Wide Trousers for Women: Which Style Actually Works Best?
Battery-Powered LED Lights
Adding lights inside your snowman creates a magical evening display. Since the white plastic cups allow light to pass through softly, the entire snowman glows beautifully after dark.
Battery-powered fairy lights are the safest option because they produce very little heat. Warm white lights create a traditional holiday appearance, while colorful LEDs give the snowman a playful look.
Never place candles or plug-in bulbs with high heat inside the snowman, as they could damage the plastic.
Choosing the Best Plastic Cups
Although every white plastic cup may appear similar at first glance, choosing the right cups will greatly affect the quality of your finished snowman. Strong, durable cups make assembly easier and help maintain the smooth spherical shape throughout the construction process.
Look for cups that have consistent sizing and smooth surfaces. Uniform cups fit together more neatly, resulting in a cleaner and more professional appearance. If the cups vary in size or shape, your snowman may become uneven or difficult to assemble.
Medium-weight plastic cups are usually the best option. They are rigid enough to support the overall structure while remaining flexible enough for easy stapling. Extremely thin cups may buckle under pressure, while overly thick cups can be harder to staple together.
It’s also a good idea to inspect each package before purchasing. Avoid cups that are cracked, warped, or dented, as imperfections can affect the final shape of the snowman.
If you intend to place LED lights inside, opaque white cups create the nicest glow because they diffuse the light evenly instead of allowing harsh bright spots to shine through.
Taking a few extra minutes to choose high-quality cups at the beginning can save considerable time and frustration during the building process.
Planning Your Snowman’s Size
Before attaching the very first cup, spend some time planning the overall size of your snowman. This simple step makes the construction process much easier and helps you estimate how many materials you’ll need.
Think about where the finished snowman will be displayed. If it’s intended for a living room corner, a medium-sized design may be perfect. For school entrances, shopping displays, or community events, a larger snowman creates a stronger visual impact.
The body should always be larger than the head to maintain natural proportions. Most builders create a large bottom sphere and a slightly smaller top sphere, giving the snowman its familiar appearance.
You should also consider storage. A very large snowman looks impressive during the holidays but may require more storage space after the season ends. If you have limited storage, building a medium-sized version can be a practical choice without sacrificing appearance.
Planning also allows you to estimate the number of cups, staples, and decorations you’ll need, helping you avoid unnecessary interruptions once construction begins.
Snowman Size Guide
| Snowman Size | Approximate Number of Cups | Best For |
| Small | 120–150 | Tabletops, apartments, offices |
| Medium | 180–250 | Living rooms, classrooms, entryways |
| Large | 250–350 | Holiday events, schools, churches, shopping displays |
Step 1: Building the Foundation Ring
The foundation is the most important part of the entire project because every additional row depends on this first circle being properly assembled. If the base is uneven, the rest of the snowman may become unstable or lose its round shape.
Start by placing approximately twenty to twenty-five plastic cups in a large circle with the open ends facing inward and the rims touching one another. The exact number of cups will depend on the size of your snowman, but the goal is to create a smooth, symmetrical ring.
Once you’re satisfied with the arrangement, begin stapling each cup securely to the cup beside it. Work slowly around the circle, making sure every connection is firm before moving on. As the final cups are attached, gently adjust the shape until the ring forms a neat, even circle. This foundation will support every additional layer, so taking your time here will make the rest of the construction process much easier and produce a stronger, more balanced snowman.
Step 2: Build the Second Row of the Bottom Sphere
Once the foundation ring is complete, you can begin shaping the snowman’s body by adding the second row of plastic cups. This is where the structure starts transforming from a flat circle into a three-dimensional sphere. Although the process is simple, taking your time during this stage will ensure the snowman remains balanced and symmetrical.
Place each new cup slightly above the gap between two cups in the first row instead of directly above another cup. This staggered pattern strengthens the structure because every cup helps support multiple neighboring cups rather than relying on a single connection. Continue stapling each new cup to the cups beside it as well as to the cups below whenever possible. The more secure the connections are, the sturdier the finished sphere will become.
As you work around the circle, gently press the cups inward. This slight inward curve is what gradually creates the rounded shape of the snowman’s body. Avoid forcing the cups into position because excessive pressure may crack or deform the plastic. Instead, let the natural flexibility of the cups guide the curve. By the time the second row is complete, you’ll already notice the snowball shape beginning to appear.
Step 3: Continue Building the Lower Half of the Body
After completing the second row, continue adding additional rows using the same technique. Every new layer should be positioned slightly inward from the previous one, allowing the body to slowly curve toward the center. This gradual reduction in diameter is what gives the snowman its smooth, rounded appearance.
As you build higher, check the shape from different angles every few rows. Looking at the structure from the front, sides, and above helps you spot uneven areas before they become difficult to correct. If one side appears flatter than the other, simply adjust the positioning of the next few cups to restore the curve.
It’s also helpful to rotate the entire structure occasionally while working. Rotating the snowman allows you to maintain an even shape all the way around instead of focusing on just one section. If you notice a cup sitting higher or lower than the others, reposition it before adding more layers.
Many beginners worry if small gaps appear between some cups. In most cases, these tiny openings are completely normal and won’t affect the overall strength of the structure. In fact, the slight spaces between cups often help create a softer glow later if you decide to install LED lights inside.
Continue building until you’ve formed a complete lower hemisphere. At this stage, your snowman’s body should resemble half of a large plastic ball with a wide opening at the top.
Step 4: Complete the Bottom Sphere
Now it’s time to finish the lower body by creating the upper half of the sphere. This part follows the same process as the lower half but in reverse. Begin building inward from the open edge until the opening becomes smaller and smaller.
As the rows become shorter, you’ll naturally use fewer cups with each layer. Continue attaching every cup securely while maintaining the smooth curve you’ve already established. Patience is especially important during these final rows because the tighter shape requires more careful positioning.
Many crafters choose to leave a small opening at the very bottom or back of the sphere. This opening isn’t visible once the snowman is standing, but it serves several useful purposes. It allows you to insert battery-powered LED lights, makes transportation easier by providing a handhold, and gives you access to the inside if repairs are ever needed.
Once both halves meet, your finished sphere should feel surprisingly strong despite being made from lightweight plastic cups. Lift it gently to make sure all connections are secure. If any area feels loose, simply add a few extra staples before moving on.
This completed sphere becomes the snowman’s body and forms the foundation for everything that follows.
Step 5: Build the Snowman’s Head
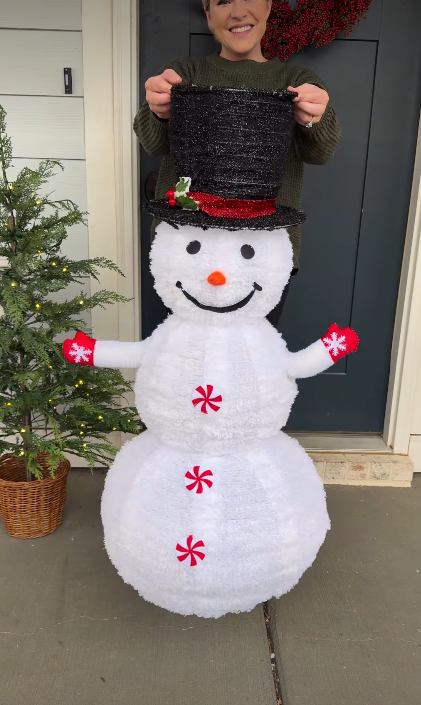
With the body complete, you can begin constructing the head. The overall process is identical, but the head should always be smaller than the body to create realistic proportions. A head that is too large can make the snowman appear top-heavy, while one that’s too small may look out of balance.
Start by creating another circular foundation ring using fewer cups than you used for the body. Continue building upward row by row, gradually curving the cups inward until you’ve formed the first hemisphere. Then repeat the process to complete the second half.
Because the head is smaller, you’ll notice that it comes together more quickly than the body. Even so, don’t rush through the assembly. Consistent spacing and secure stapling remain just as important. Check the shape frequently to ensure it stays evenly rounded from every angle.
Once the head is finished, compare it with the body before attaching them. The size difference should be noticeable but still proportional. A well-balanced head gives the snowman a friendly and natural appearance that makes the finished decoration much more attractive.
Step 6: Attach the Head to the Body
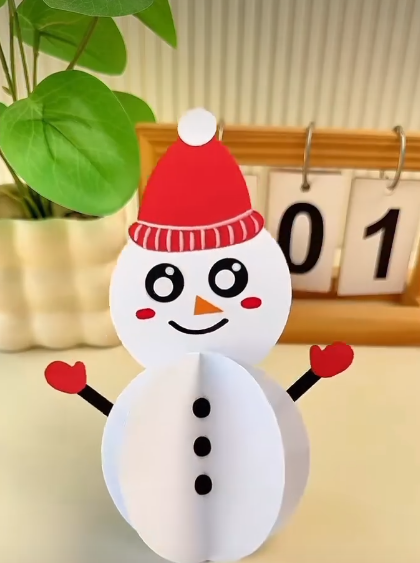
Joining the two spheres is one of the most exciting moments of the project because your snowman finally begins to take shape. Carefully place the smaller sphere on top of the larger one and experiment with its position before making any permanent connections.
Most builders center the head directly over the body, but slightly tilting it to one side can create a playful and expressive pose. Once you’re happy with the placement, begin securing the head using staples where the rims of the cups meet. Work your way around the connection point until the head feels stable and doesn’t wobble.
For additional strength, many crafters apply small amounts of hot glue between the touching cups after stapling. The glue isn’t required, but it can help reinforce the joint if the snowman will be moved frequently or displayed in busy areas.
After attaching the head, gently test the stability by lightly shaking the structure. If any movement occurs, reinforce the connection with a few extra staples. A secure connection ensures the snowman remains sturdy throughout the holiday season.
Step 7: Create a Friendly Snowman Face
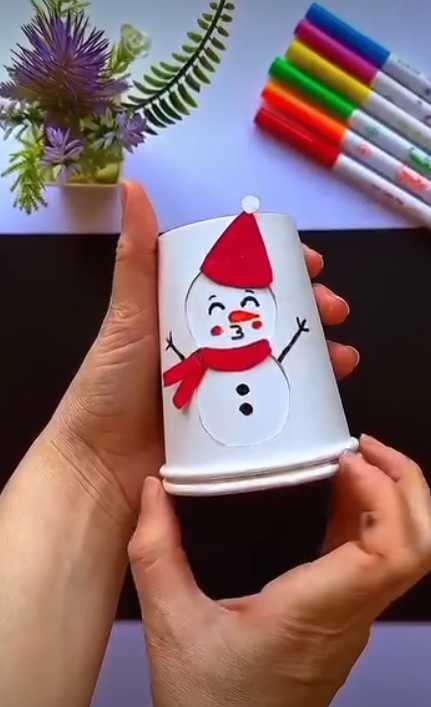
The face is what brings your snowman to life. Even a simple smile can give it warmth and personality, making it feel cheerful and welcoming.
Begin by deciding where each facial feature will be placed before attaching anything permanently. Stand several feet away and imagine how the finished face will look from a distance. Balanced placement is much more important than perfectly matching measurements.
For the eyes, cut two large circles from black craft foam or construction paper. Position them evenly above the center of the face, leaving enough space between them for the carrot nose. Larger eyes often create a friendlier appearance, while smaller eyes can give the snowman a more traditional look.
Next, create the mouth using several small black circles arranged in a gentle upward curve. Instead of making a perfectly straight line, slightly curve the smile upward at both ends to give the snowman a happy expression.
Finally, make the classic carrot nose by rolling orange paper into a cone. Secure the cone with glue or tape, then attach it firmly between the eyes. The nose should project outward naturally without drooping.
If you’d like to add even more personality, consider including rosy cheeks, eyelashes, raised eyebrows, or a cheerful wink. Small details like these can completely change the snowman’s expression.
Step 8: Add Decorative Buttons
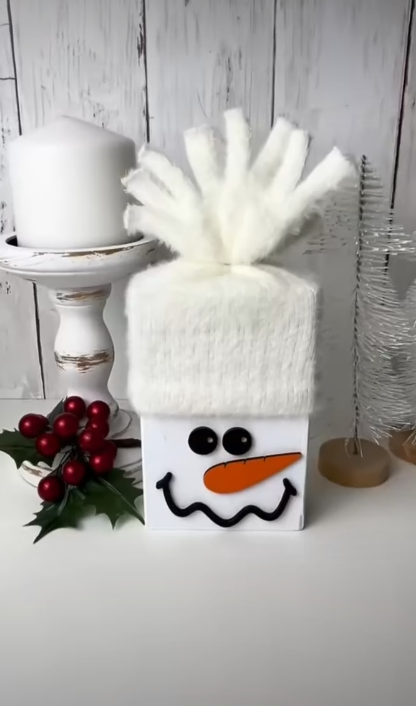
Buttons may seem like a small detail, but they greatly enhance the finished appearance of your snowman. Large black circles placed vertically down the center of the body create the familiar traditional look that everyone recognizes.
Cut three or four circles from black foam, felt, or construction paper. Space them evenly from the neck area down toward the bottom of the body. If you prefer a more colorful design, use red, green, gold, or glitter-covered circles instead of plain black.
Some people also decorate the buttons with snowflake stickers, sequins, or tiny bows. These decorative touches make the snowman feel more festive without overwhelming the clean white appearance created by the plastic cups.
Step 9: Dress Your Snowman
Adding clothing and accessories is where your creativity can truly shine. The same basic snowman can look completely different depending on the decorations you choose.
A soft knitted scarf instantly adds warmth and color. Wrap it gently around the neck without pulling too tightly, allowing the ends to hang naturally over the front of the body. Bright red, green, plaid, or blue scarves all create different seasonal styles.
Next, place a hat on top of the snowman’s head. A classic black top hat gives the decoration a timeless appearance, while a Santa hat adds Christmas spirit. A knitted winter cap creates a cozy, family-friendly look that works beautifully in living rooms and classrooms.
Additional accessories might include:
- Cozy earmuffs
- Fabric mittens
- Decorative ribbons
- Small gift bows
- Pinecones
- Artificial holly leaves
- Tiny jingle bells
- Snowflake ornaments
- Mini wreaths
- Holiday brooches
Remember that balance is important. Too many decorations can hide the clean snowman design, while a few carefully chosen accessories often create a more elegant finished project.
Step 10: Add LED Lights for a Magical Winter Glow
One of the easiest ways to make your snowman stand out is by placing battery-powered LED lights inside the body. During the daytime, the snowman already looks attractive, but once evening arrives, the soft glow shining through the white cups creates a magical winter atmosphere.
Before placing the lights inside, check that the battery pack is fully charged or fitted with fresh batteries. Position the lights loosely within the lower body rather than packing them tightly into one area. Even spacing helps distribute the light more uniformly throughout the entire snowman.
Warm white LED lights create a soft, elegant glow reminiscent of freshly fallen snow under moonlight. If you’re decorating for children or holiday parties, colorful LEDs can produce a fun and playful effect. Some battery-operated light strings even include flashing or fading modes for extra visual interest.
Secure the battery pack in an accessible location near the opening you left during construction. This makes it easy to replace batteries without disassembling the snowman.
Never use candles, incandescent bulbs, or any heat-producing light source inside the plastic cups. Battery-powered LEDs are the safest choice because they remain cool even after hours of use.
Creative Decoration Themes
One of the greatest advantages of making a Creative Winter Craft: DIY Snowman Made from Plastic Cups is that you can customize it to match almost any decorating style. Instead of creating the same traditional snowman every year, try experimenting with different themes that reflect your personal taste or holiday décor.
Classic Holiday Snowman
The traditional design never goes out of style. Pair a black top hat with a bright red scarf, black buttons, and a cheerful carrot nose. This timeless combination looks wonderful in homes, schools, churches, and community events.
Rustic Farmhouse Snowman
For a cozy farmhouse style, choose a plaid scarf, burlap ribbon, wooden buttons, and a simple felt hat. Small pinecones, twine bows, and artificial greenery can be added around the neck to complete the rustic winter look.
Elegant Winter Wonderland
If your holiday decorations feature silver, white, and gold, decorate the snowman with satin ribbon, glittery snowflakes, pearl accents, and white fairy lights. This sophisticated style works beautifully in entryways and formal living rooms.
Santa-Inspired Snowman
Replace the traditional hat with a Santa hat, add a red scarf trimmed with white faux fur, and attach miniature candy canes or tiny gift boxes around the base. This playful design fits perfectly with Christmas decorations.
Children’s Colorful Snowman
Encourage children to decorate the snowman using bright scarves, colorful buttons, craft foam shapes, and festive stickers. Every child can contribute their own ideas, making the finished project a unique family creation.
Best Places to Display Your Snowman
After completing your Creative Winter Craft: DIY Snowman Made from Plastic Cups, the next exciting step is deciding where to display it. Since this decoration is lightweight yet visually impressive, it can become the focal point of almost any holiday setting. Choosing the right location not only makes your snowman more noticeable but also helps protect it from accidental damage.
For indoor use, many people place their snowman beside the Christmas tree, near the fireplace, or in the front entryway where guests can immediately admire it. The glowing white cups and festive accessories create a warm welcome for family and visitors alike. If you have battery-powered LED lights inside the snowman, placing it in a slightly dim corner allows the gentle glow to stand out even more during the evening.
Schools and classrooms are also excellent places to display a plastic cup snowman. Teachers often use them to decorate reading corners, classroom entrances, libraries, or holiday event stages. Since the snowman is made from lightweight materials, it can easily be moved from one location to another whenever decorations need to be rearranged.
Businesses and offices frequently use handmade snowmen in reception areas, waiting rooms, and employee break rooms to create a cheerful holiday atmosphere. Shopping centers, community halls, churches, and winter festivals also benefit from large snowmen because they immediately capture attention and encourage visitors to take photographs.
If you prefer displaying the snowman outdoors, choose a covered porch, enclosed patio, or sheltered balcony where it will remain protected from rain, strong winds, and direct sunlight. Although plastic cups are durable, prolonged exposure to harsh weather may weaken the structure or fade decorative accessories.
No matter where you display your snowman, make sure it stands on a flat and stable surface. This helps prevent tipping and keeps the decoration looking its best throughout the holiday season.
How to Store Your Snowman After Winter
One of the biggest advantages of creating a Creative Winter Craft: DIY Snowman Made from Plastic Cups is that it can be reused for many years. Proper storage protects your hard work and saves you from rebuilding the snowman every winter.
Before putting the snowman away, remove any detachable accessories such as scarves, hats, ribbons, bows, and battery-powered lights. Storing these items separately prevents them from becoming wrinkled or damaged during the off-season. If your accessories are fabric, make sure they are completely clean and dry before packing them away.
Next, inspect the snowman for any loose staples or decorations. Small repairs are much easier to make before storage than after several months have passed. Reinforce weak connections with a few extra staples or a small amount of hot glue if necessary.
Dust the plastic cups gently using a microfiber cloth, feather duster, or soft brush. Avoid using excessive water or harsh cleaning products because moisture can damage paper decorations and loosen adhesives. If any cups have fingerprints or light stains, simply wipe them with a slightly damp cloth and allow them to dry completely.
Choose a large plastic storage container or a sturdy cardboard box that provides enough room for the snowman without squeezing the cups. If possible, wrap the snowman loosely with a clean sheet or lightweight fabric to prevent dust from collecting while allowing air circulation.
Store the container in a cool, dry location such as a closet, attic with climate control, or storage room. Avoid placing heavy boxes on top of the snowman, as too much pressure can flatten the cups and distort the spherical shape. With proper care, your snowman can remain in excellent condition for many holiday seasons.
Maintenance Tips to Keep Your Snowman Looking New
Even though plastic cup snowmen require very little maintenance, a few simple habits can keep them looking fresh year after year. Regular care ensures that your decoration continues to impress guests every holiday season without requiring major repairs.
Dust is one of the most common issues, especially if the snowman remains on display for several weeks. A quick weekly dusting with a soft microfiber cloth or feather duster is usually enough to keep the white cups bright and clean. If your snowman contains LED lights, switch them off before cleaning to avoid accidentally pulling on the light string.
Check the stability of the head and body occasionally, particularly if the decoration is moved frequently. If you notice any loose staples or shifting sections, reinforce them before they become larger problems. Small repairs only take a few minutes and can greatly extend the life of the snowman.
Fabric accessories such as scarves and hats should also be inspected. Straighten them if they become twisted, and remove any lint that may have collected over time. Decorative bows, buttons, and ribbons can be gently reattached if they begin to loosen.
If your snowman is displayed in a home with pets or young children, place it in an area where it won’t be bumped or climbed on. Although the structure is surprisingly sturdy, repeated impacts can weaken the connections between the cups.
Safety Tips for a Successful Crafting Experience
Safety should always be a priority during any DIY project, especially when children are involved. Fortunately, building a plastic cup snowman is generally very safe as long as a few basic precautions are followed.
When using a stapler, always keep fingers away from the stapling area to avoid accidental pinches. If young children are helping with the project, allow them to arrange the cups or choose decorations while an adult handles all stapling.
Hot glue guns should also be used with care. The melted glue reaches high temperatures and can cause burns if touched immediately after application. Place the glue gun on a heat-resistant surface whenever it is not being used, and unplug it after finishing the project.
Scissors and craft knives should only be used for cutting paper, foam, or ribbons on a stable work surface. Store sharp tools safely when they are not needed.
If you decide to illuminate the snowman, always choose battery-powered LED lights. These lights remain cool during operation and greatly reduce the risk of damaging the plastic cups. Never place candles, incandescent bulbs, or any open flame inside or near the snowman.
Finally, work in a spacious, well-lit area where you have enough room to move around comfortably. A clean workspace helps prevent accidents and makes the assembly process much more enjoyable.
Common Mistakes to Avoid
Many first-time builders encounter small challenges while making their snowman. Fortunately, most of these issues can be avoided with careful planning and patience.
Using Thin Plastic Cups
Very thin cups may bend or crack during stapling, making the structure weaker and more difficult to assemble. Choosing medium-weight cups provides better support throughout the project.
Rushing the Assembly
Trying to complete the snowman too quickly often results in uneven rows, loose staples, and poor alignment. Building slowly allows you to check the shape frequently and correct small mistakes before they become larger problems.
Uneven Foundation Ring
The first circle determines the shape of the entire snowman. If the base isn’t symmetrical, every additional row will become increasingly uneven. Spend extra time making the foundation as accurate as possible.
Overloading Decorations
Accessories make the snowman more attractive, but too many heavy decorations can pull sections out of shape. Choose decorations carefully and distribute their weight evenly.
Forgetting Structural Support
Every cup should be securely attached to neighboring cups. Skipping staples to save time can create weak points that may separate later.
Using Unsafe Lighting
Heat-producing lights can damage plastic cups and create unnecessary safety risks. Battery-operated LED lights are always the safest option.
Poor Storage
Placing heavy objects on top of the snowman during storage can flatten the cups and permanently change the shape. Proper storage is essential for long-term durability.
Eco-Friendly Ways to Make This Craft More Sustainable
Although disposable plastic cups are commonly used for this project, there are several ways to make your craft more environmentally responsible. Small choices can reduce waste while still allowing you to enjoy a beautiful winter decoration.
If you have leftover clean plastic cups from parties or celebrations, consider reusing them instead of purchasing new ones. This gives the cups a second purpose and helps reduce unnecessary waste. When buying new materials, choose recyclable plastic cups whenever possible.
Instead of throwing away the snowman after the holidays, store it carefully and use it again every winter. A reusable decoration is far more sustainable than rebuilding a new one each year.
If a few cups become damaged, replace only the affected section instead of dismantling the entire snowman. Small repairs extend the life of the decoration and reduce the need for additional materials.
You can also incorporate reusable accessories such as fabric scarves, knitted hats, wooden buttons, or cloth ribbons. These items can easily be removed and used again on future projects.
By making thoughtful decisions throughout the crafting process, you can enjoy your holiday decoration while minimizing unnecessary waste.
Frequently Asked Questions
How many plastic cups do I need?
The number depends on the size of your snowman. A small tabletop version usually requires between 120 and 150 cups, a medium-sized snowman generally uses 180 to 250 cups, and a large life-sized display may require 250 to 350 cups or even more.
Can I use clear plastic cups instead of white ones?
Yes, but white cups provide the classic snow-like appearance. Clear cups can create an interesting effect if illuminated with white LED lights, although the overall look will be more transparent than traditional.
Is a stapler enough to hold the structure together?
Yes. Most plastic cup snowmen are built entirely with staples. Hot glue is optional and mainly used for attaching decorative accessories or strengthening certain connections.
Can children help make this craft?
Absolutely. Children can arrange cups, decorate the face, choose scarves, and attach lightweight decorations. Adults should supervise the project and handle stapling, cutting tools, and hot glue.
How long does it take to build?
The total time depends on the size and your experience. A small snowman may take two to three hours, while a larger and more detailed version can require four to six hours or more.
Can I use the snowman outside?
Yes, but it should only be displayed in covered outdoor areas such as porches or sheltered patios. Strong winds, rain, snow, and prolonged sunlight may damage the structure over time.
What type of lights should I use?
Battery-powered LED fairy lights are the safest and most effective choice. They remain cool during operation and create a beautiful glow through the white plastic cups.
Can I decorate it in different styles?
Definitely. One of the best features of this craft is its versatility. You can create a traditional snowman, a Santa-themed design, an elegant winter decoration, a rustic farmhouse version, or even a colorful character for children.
Final Tips for the Best Results
Before starting your project, organize all of your materials so everything is within easy reach. Work on a large, flat surface where the cups can be arranged comfortably, and don’t rush through the assembly process. Checking your progress after every few rows helps maintain a smooth, symmetrical shape.
Feel free to experiment with different accessories and color combinations to create a snowman that reflects your personal style. Whether you prefer a simple traditional design or a more elaborate holiday display, patience and creativity will always produce the best results.
Most importantly, enjoy the process. Building a snowman from plastic cups is not just about creating a decoration—it’s about spending time with family, expressing your creativity, and making lasting holiday memories.
Conclusion
A Creative Winter Craft: DIY Snowman Made from Plastic Cups is much more than a simple seasonal decoration—it’s a rewarding project that combines creativity, affordability, and festive spirit into one memorable activity. With only a few basic materials and a little patience, you can transform ordinary plastic cups into a charming three-dimensional snowman that brightens your home, classroom, office, or holiday event. From carefully building each sphere to adding a cheerful face, cozy scarf, and glowing LED lights, every step allows you to personalize the design and make it uniquely your own.
One of the greatest advantages of this craft is its long-lasting value. Unlike a real snowman that melts away, your handmade creation can be stored and enjoyed year after year, becoming a treasured part of your holiday traditions. It also encourages family bonding, inspires creativity, and provides an enjoyable hands-on activity for both children and adults. Whether you’re crafting for fun, decorating for Christmas, or creating a centerpiece for a winter celebration, this DIY snowman is a beautiful reminder that the most meaningful decorations are often the ones made with your own hands. With thoughtful planning, careful assembly, and a touch of imagination, your finished snowman will spread warmth, joy, and festive cheer throughout the entire winter season.